Description
During the class, we integrate the Spine Arc – if you don't have one you could use a rolled-up towel or simply do the exercise without props.
About This Video
Transcript
Read Full Transcript
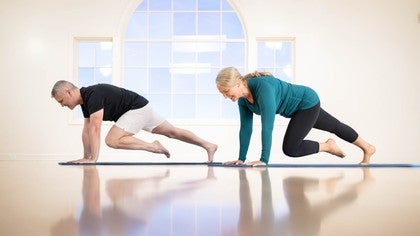
Hello, I'm Sally Anderson, and we are going to do a calm and centered Reformer. Andrew Aroustian will be demonstrating for me, and we will be using a set of hand weights, so two pounds, or for my Aussie friends, one kilo. And we will be integrating the spine arc just for a little bit towards the end. If you don't have a spine arc, it's absolutely fine, you can do it without and you'll still get a lot of benefit from it. So pop those to the side for the moment, and we'll start with a lunge.
So I'll ask Andrew to come forward. We're going to integrate our calm breathing with an opening of the hip flexor in the front of the body in this lunge position. So the foot is against the shoulder rest. The front foot, I want toes to be coming to the end of the Reformer here. We've got the foot bar up, and I have one and a half springs.
But if you're a smaller person, put one spring. You just want enough to kind of have a bit of feedback and something to move, but it's all about the body opening up. So then the upper torso is just elongated and looking forward. And we're going to use the calm breath, inhale for five seconds going back. So inhale.
Two. Three. Four. Five. Hold for two.
Exhale. Two. Three. Four. Five.
Hold for two. Do two more cycles, and what I'm looking for is the hip is open and the heel is back and the torso is upright, and then allow that return. The hip bone or the ASIS on that side works towards the foot bar. One more on this side. So inhaling as you go back.
Holding for your two, then exhaling, bringing that ASIS forward, and pause. Come off and we'll come to the other side. So in total we'll have six rounds of the calm breathing while we're opening the front of the body. So this foot comes forward to the end of the Reformer, chest forward and heel back. Inhale.
Andrew says he likes to count seconds Mississippi so we'll do one Mississippi, two Mississippi this time. Hold. On the exhale, two, three Mississippi, four Mississippi, five Mississippi. Hold. Two.
And press Good, so keeping this really easy upright position, arms are straight, and they're kind of pressing into the foot bar to help you pull up and bring the hip bone forward. One more. Or have I done an extra one? No? Good. And think about that hip bone ASIS forward, as you press with the arms, bring this up.
Hold for two. And then bring yourself off there. Now, we're going into leg and footwork. I'll just do the foot bar change. I'd like you to take the foot bar down one notch, so it's a low foot bar.
Put your leg and footwork springs on. I'm doing three and a half, but three, three and a half will be lovely. Let's leave the headrest down, but if you feel uncomfortable you can always bring that up a little, too. Coming onto the Reformer, feet into V position to begin. Good.
So, heels will be slightly raised. Not too much, and I'm going to spread toes a little, so make sure you get a generous kind of toes apart. Heels are raised, and as you push out, we're not going to go just yet. As you push out, the heels will lower to a flat foot, but we're going to use one inhale all the way out and in. Your next repetition will be an exhale all the way out and in.
So away we go. For inhale, heels lower as you inhale and return. Exhale and return. So we build a little flow to the movement with the inhale on one repetition all the way through, exhale on one repetition all the way through. Challenge is then to count while you do the different movement or different breathing.
Two more I believe would make 10. And exhale. So it's five breath cycles over the 10 repetitions. Turn to parallel, still on the toes. Same thing. Inhale, extend the legs.
Feet just flatten. And then heels come up slightly just naturally as you bring the body back in. Inhale for the extension and return. Exhale for the extension and return. Good.
Think about the breath being even all the way through the movement. And exhale, and then we'll do one more breath cycle which will be two more repetitions. Inhale all the way out and in. Exhale all the way out and in. Now just stretch straight back out and hold.
Same idea with the breath cycles here for raisers. Inhale, under and up. Exhale, under and up. Now as you're working through this, just try to feel like the weight of the legs and the pelvis drop into the carriage. So you soften the pelvis back, which gives us more opening in the hips, which we have started to get a little from lengthening through the lunge.
But I wanna feel like this whole upper thigh to midsection of the torso is allowed to open and lengthen. And we'll do four more repetitions. Inhale, under. Exhale, under. Last two. And bring that back home.
We'll take the legs out wide onto the toes, or the feet onto the toes. Now we're going to turn the knees in, but just think of, so don't think of forcing them in. Just rotate from the thighs to allow those bones to wrap in, which may mean that heels come out a little, or they go where they need to. Now you're going to extend as far as it feels good for you, trying to maintain internal rotation of the thigh. So knees can come apart and then come back together.
I want you to maintain the same breathing pattern we've had. Inhale for a full repetition. Exhale for a full repetition. So, legs are trying to wrap in. It'll be different on everyone, it'll probably be different leg to leg, but think of that focus of wrapping the thighs in.
And we have two more repetitions after that one, that was an exhale, So we'll do inhale repetition. And exhale repetition. And pause. Good. Now come back to the toes in the center for your prancers. Before we start, I'd like inhale for two.
Exhale for two. Away we go, take it out. Keep the breath flowing and even through the movement Now, think about letting all the tension go through the rest of the body. Legs, calves, feet can do the work. Allow the pelvis to drop, rest into the carriage, front of the hips open.
Exhale for two. Good. Last set of six. Four. Two. That was the weirdest counting ever, right?
I knew what I was doing. Beautiful. Stay there. Now, bring yourself onto your heels on the foot bar. So we're going to do single legs. I will take a half spring off for this one.
Although leaving it on the stronger spring can sometimes be a really nice way to load the base of the pelvis, which draws you down out of the shoulder girdle, head and neck area, and can really feel like you're giving the pelvis some anchoring. But three springs will do me for the moment. Leave the left heel on the bar, take the right leg into puppy paw. So that's going to be a floppy paw, vertical thigh. Let's do it, actually let's change sides and do it on the other side so you can see.
So this thigh is vertical, and the paw is hanging. So it may be just under the bar. Then through the heel on this side, find the back of the leg, and press out. Inhale for one repetition. Exhale for one repetition.
And breathe in, and now just watch that you don't start to get too fast with the breath. You wanna match the movement to the breath, but keep that length and fluidity of the breath. And one more repetition. Good, change sides. So, heel in line with the sitting bone, find that puppy paw, and then find the back of the active leg to press out.
Inhale. Exhale. Good. And that puppy paw leg just allows a little more work down and low in the abdominals into the hip joint, allows the femur to sit in the hip joint, and then the pelvis and abdominals to work a little more actively to hold that position. You get that kind of unilateral work as well.
Good. And hopefully Andrew's counting. Last one, yes? And pause. Good. Both feet onto the foot bar. Just rest there for a moment.
We're going down to one and a half springs. Or, again, if you're a smaller person, you may want to do one spring. We're going hands in straps. So, taking the hands into the straps here. Start with them reaching to the ceiling, and then I'll have legs both into puppy paw, so they're just going to be, we'll need to pop Andrew's feet just below that little foot bar.
That's good, so that I want you to see the vertical thighs there, and that the lower limb is just hanging. So holding that position, you're going to do a full range down, out, in, and up. Now it's one breath cycle, so you'll do inhale down, T, exhale in, and we're coming back to our more normal breath cycle pattern of inhale. Exhale. So we're focusing on abdominals doing the work here.
Use the exhale to deepen, maintain connection to the carriage, while you get a long fluid movement. Good, and I'll have three more. So what to watch as you go through this is that thighs don't start to drop away, just feel like they really sit into the hip joints vertical, 'cause as you go through repetitions, they'll either wanna pull in with more hip flexes or they'll drop away and hang off it, and I'd like you to find them, really focus down and in. Last repetition. Good.
And pause, feet back onto the foot bar. And that will allow us to change the spring to two, so two red springs or two full springs. We're putting feet into straps. So, however you put them in is fine, both feet at the same time or one at a time, I'm happy with either. So then finding the pelvis nice and weighted into the carriage, start with your little frog, but we're back to our inhale for the whole repetition here.
So lengthen out, inhale, and return. Exhale and return. I'll have eight more, please. Good. Shoulders relaxed, throat is open. And the pace is nice that Andrew has here. I now want it to be just picking up a little bit more kind of tempo without losing the flow and the control, and the breath matching it.
I think we have two more. And last repetition. Good. Now take the legs to the ceiling straight up, and we'll find our foot position here. I want you to bring toe joints and the toes, big toes, together.
Heels are apart, so we've gone back to that slightly internally rotated thigh position without forcing it. So I want you to think about sitting bones are broad, thigh bones are wrapping in, toes are connected the whole time, and from the hamstrings, press the feet down or press the legs down to 45. Now on the way up, allow the pelvis to weight into the carriage, the femurs drop into the hip joints. Find your vertical position. You've got five more. Maintain that gentle rotation in, connecting the big toe joints and the big toes.
And just feel the sensation of where your thigh bones are in this position, because we're gonna use it for the next exercise as well. And you get that hinge on the way up allows the pelvis to be heavy into the carriage. And one more, just for good luck. Now we're taking that into the circle. So as I say, I want you to maintain that internally rotated position as you press down, but rotate out as you come around.
So I call it a rotating leg circle. You're gonna think about it from the thighs coming in and out as you circle, and then build a little tempo without making it too big, so that's as big as I'd want the circles, keep it a little smaller, and make it more about the thigh bones in the hip sockets. Good, and over time as you practice this, I want it to become more of a flowing movement in the hip joint, one more will make six, yes? And then reverse. Now. So you're going to go 'round in internal rotation.
Internal rotation comes back together in external rotation, so you're just reversing the rotation as you reverse the circle. Not too much to ask for, is it? Maybe. Good. Three more. And lovely, Andrew.
Good, nice. So again, over time as you practice this, you just get probably even a little smaller in the range and just make the thighs do the movement, and really eases into the hip joints. Now, we're going into a grand circle, so I want the circle to be as big as it can be, going down the center first, just let the thighs be in that neutral position. Now bring the legs around. You're gonna let the straps bring them all the way that you can for the bed to come in, and then hamstrings press you through.
We'll have five each direction. And yes, Andrew has quite a good range, particularly for a male. So you don't need to get this range, you need to work in your range of the biggest circle you can, keeping the pelvis connected to the carriage as the legs come through that full hamstring length, then engage them, send the pelvis down, and take the movement again. I think we have one more this direction, is that? Good.
And again, this will build as you feel more familiar with how the Reformer takes that movement over for you. Reverse it. Legs go over, so the Reformer carries the legs there. You bring them around, get the sacrum flat, bring them back together. That's one big circle.
And as you come around, I've got my hands here because I wanna make sure that you're not going too low. Andrew's in a good position, but just kind of avoid that getting legs right down into the springs, around the 45 degree, but it will be dictated by how you maintain the lever or hold that load of the lever as the legs come into their extended position. One more. Good. So last big circle.
That should've felt pretty nice. Bend the knees back in and take the straps off your feet, feet back onto the foot bar. Good. We'll hook this up. And we're coming up for knee stretches, but we're leaving the foot bar down. So yes Andrew, if you'll come through, I'm leaving it on two springs or your one and a half, wherever you're set at the moment.
We're leaving the foot bar down and coming kneeling on the bed for low bar knee stretches. So, just set the upper body, but be over your arms just a little bit. And what I want to avoid is too much tucking of the pelvis. Just think of this like a cat sit. So you're sitting back to the heels, then the bed is going to push out, so legs push the bed out, and return.
Good. Little less range back. All right, now we're back to inhale for one repetition. Exhale for one repetition. And all the way through this I just wanna be focusing on the hinge of the hips, even if you get a little more sit. Yeah, so the spine stays in the same position, a gentle elongated C curve, and the sitting bones kind of come to the heels.
That's a good way of thinking where the pelvis is sitting. And I think this is the last one. Hold. Take this into a long flat back, or a lengthened back. So not too much extension, just think of sitting bones going to the back wall, and we'll have 10. Inhale for one.
Exhale, sitting bones out to the back wall, not tucking. Good, so here I wanna feel like there's that long, lengthened, kind of flat, but it's not my favorite word for it, but lengthened spine, crown of the head to the sitting bones in opposite directions, and a lot of work going on inside the body. So that length is coming very internally, and then the body's free to move on the outside. Are we 10? Now hold that last position.
I want nothing to change with the Reformer or the body. The head will just turn to the left. Look with your eyes to try and look back over your shoulder, and center. To the right. I don't mind how you breathe for this, I just want three each side, rotating, trying not to lift the head or drop the head to rotate, but taking the eyes back over the shoulder.
Good. And take it one last one each side, just rotating the neck, and I want you to think of that, just down that transverse pole, you're just rotating around it. Good, from there we're going into an elephant with a variation. So standing up, I'd like you to be forward on the carriage. Big toes, it's a big toe class, so come back a little, Andrew, just where big toes over the edge, V position, and then round the back and bring your body over your arms again.
So I want you to be thinking of weight evenly over arms and legs. You may wanna connect those big toes around the carriage, and feel the back of the legs press the carriage away. So it's a real sense of getting strength and power in the back of the legs. As it comes back under you're going to scoop a little higher, press away through the arms. We're back to just a normal breath cycle for the elephant.
Inhale, push. Exhale, under. So in this I really do want you to try and find the sensation of connecting through the feet, the legs, and the work in the back of the legs as it comes under the rounding, releasing of the head-neck, and drawing up through the torso. Last two. And pause. Good.
So, soften the knees and just come up gently from there to step off the Reformer. So however that feels best for you. Coming off, we are now going to put the spine arc on. So I'll set you up. The headrest does need to be down, but as you can see with these spine arcs, they fit between the shoulder rests.
I would like it to be about halfway up the headrest. So we're setting the edge of it halfway up the headrest, and that gives us kind of position in front of the shoulder rest to have the head back. However, if you need to move it forward or back, that will be completely fine. You'll find your spot. So from there, I'm going to ask Andrew to lie over it on his back.
So you can put the legs over the foot bar if you like, hip right at the front of the carriage. Over it goes. Nice. Beautiful, and I might have you shuffle just a little bit back over that, so that gives you... Yes, so what I'm looking for there is getting that extension through the upper body, opening of the throat, head back but comfortably supported on the downward slope.
Then I like to keep feet up on the foot bar, but you could hook them over. I'm happy for legs to be wherever feels best for you. Then we're taking our little hand weights. So, starting with a protraction, retraction, just reach the arms up to the ceiling then let them drop around the arc. So that arc should sit right along the spine, kind of between the shoulder blades, or everybody is different, but you should get a sense of the shoulder blades coming down the sides of the arc.
That's what I want you to find first with protraction, retraction, and that allows us to really open the front of the chest. Good. One more. And then I feel like that's settled there. We're going into an elbow opening, so the palms will be together to begin with. But as you open out, take the elbows to the carriage, bring them back, palms face each other.
So we've got a little rotation of the upper arms as we go. When you're coming out here, the hand is above the elbow and then as you come back up, the shoulders drop around the arc. So we've got 10 more. Inhale. Exhale.
Working two directions as the hands come back up. And all the while through this, just feeling broad across the chest. Use a natural breath. Inhale to open, exhale up. I don't need it forced, I just wanna feel like the throat, ribs go back, everything's open.
Four more. Good. Last three. Good, one, last one. And then hold the position to the ceiling. Stay.
Now, vertical triceps. Upper arms stay here and bend the hands towards your face. Extend them up. That's all I want. I want 10. Inhale to bend. Exhale up.
So while this is happening, you're maintaining that sinking of the shoulders around the arc and maintaining the position of the upper arms so they don't drop out to the sides, or start to squeeze in, that's sometimes too much work. So try to keep them really settled where you began, and when we've got 10. Almost there. One more. Hold. Now we're going into full openings, full range.
Inhale all the way out. Now I want you to take little bit of a moment there to get stretched. On the way up, feel like you've got stitching at the front of the shoulder that folds the shoulder, sits around the arc. Inhale, go as wide as you can. We'll do six. Exhale, fold. You can always add more.
Inhale to open wide, trying to get to the carriage if you can. Good. And we'll keep going, going, going, going, going, and then fold at the front of the shoulders. I'll have two more, please. Good.
And last one. Nice, good. So now we're going to put the weights down. What I will do is, Andrew, you can pop them down beside you. Coming in and out with the hand weights on the spine arc is going to be knowing where they are and popping them down.
If they fall off the Reformer right now, that's just how life is, right? All right, so hands behind your head just to help you come up off that arc, sitting up, so even just to there I like to use hands just to bring you out of too much pull on the neck. Then you can use arms, legs, come up to sitting any way you feel like it. And we'll try and rescue the hand weights before they fall off the Reformer. So, we don't need those again, but we are going to turn over on the spine arc onto our sides.
So keeping the arc where it is, I want it to slip in right down into the top of the hip there or the top of the pelvis. And you're lying with the underneath arm extended, so just take a moment to find it. Andrew, you might need to come down the carriage a little. Just find your position where you can work on that arc there, won't take you a moment. Then the top leg is going to come up onto the foot bar, reasonably parallel or neutrally, toes right to the front of the bar, and the underneath leg is bent in out of the way.
So, top hand will be just alongside the body. To begin with, I just want four leg extensions. Inhale into the upper side. As you extend, exhale, return. So inhale, think of filling up.
That's that one lung breathing, exhale coming in. So try and open up off the arc. Exhale in. And pause. Now we're adding the top arm. As you extend out, inhale over with the arm, lengthen the body, breathe up into the ribs.
Exhale, bring that back. Pause. Inhale, lengthen all the way, and think of that opening up on the top side of the arc, getting the lung expanding, lobe spreading. And... We've got three more.
Good. So last two, and then we're going to stay out there on the last one. So this is our last one. You're going to stay out there. Pause, now just bring the arm back beside you on the torso. Stay there. Head is hanging.
Now, probably just four repetitions, but I want you to think of bringing the ear to the shoulder to pick your head up. Hold. So that's in line with the spine. Now on the way down, allow the head to weight down and control it back, so little eccentric control to get the head back over the arm. Three more. Think of hooking your earring to your shoulder, and then allow the head to drop and take it back down.
Nice job, Andrew. Two more. Picking it up, find in line with the spine, that might be a little too high, a little too hooked, and down. This leg is meanwhile working quite strongly just to keep you out there and lengthened. Let the last head come down. Bend the knee to come back in.
Use top arm to roll forward onto it and help you come up. Change to the other side. Good. So, tuck that into the hip as you come down. And as I say, take just a moment to find where you're happy on the arc, comfortable on the arc.
Toe at the front of the foot bar. Underneath arm elongated, top arm beside the body, alongside the top of the body. That's it, good. And then we'll start with four, just pressing out. So if the heel isn't in contact with the foot bar as you are at rest, it's fine, it will hit the foot bar on the way out, but aim to do that too, so get that connection down through the heel as you press away.
And these first four set us up. Good. One more. And then we add the arm for six. So inhale, the arm goes all the way overhead opening, and exhale, back to rest. Inhale, you've got heel down, arm reach, lung opening, and back.
Four more. Good. Last two. And then on this last one, we'll stay out there. So hold, find that long line, bring the top arm back beside the body. That stays there, lengthens upper trapezius.
And we try to find this lateral flexion to lift the head to spine alignment, and then let it sink back down with control. Three more. Head in line with the spine, and then start to just play with, is my chin sticking out when it comes up? Do I need to just find that control of the throat position, or am I rotating as I come up? It's hard to kind of self-assess that, but a little bit of self-assessment attempt can give you a little bit of feedback from time to time.
Last head lift. And down. And then bring the bed back in. Top hand forward helps bring you off. We're going to clear the Reformer and take the spine arc off.
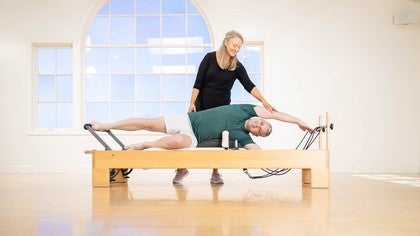
We no longer need that one. We're going to put the foot bar down. So, take it all the way flat. We'll have one red spring, and the long box on, please. So, long box will go in front of the shoulder rests.
And we're going to do a version of pull straps. No straps. So Andrew will be on your tummy, please. So lying prone or lying on your tummy as you would for pulling straps, so then same set up with where you'd be over the box, and legs just held. But instead of taking hold of the straps, take hold of the carriage.
Exactly your same position. All right, from here, pull straps, which means the head-shoulders are going to come up as you pull with the arms, and the carriage will go forward. Just to there will be fine. And coming back down. We'll do two more. This is the preparation for the next couple of variations.
Head comes through, shoulders up. Pull straps one. Good. One more like this. And now we're going to cross the legs. So to begin with, it's a little externally rotated, not forced, so knees probably to the corners of the box is enough. Find that connection of the ankles and draw it in, and give me pull straps.
Lift up, stay there. Just take a moment to allow the hips to drop into the box. Bring it back down. Change legs. So just uncross them, cross them the other side. Bring them in, lift it up, pause there.
Drop the hips into the box. Bring it back all the way. Uncross the legs. Bring them to parallel. Knees together. Now, here I really wanna work on knees together, hips down, heels to your sitting bones, and you're going to hold that position.
We'll do four. So pull straps and allow the hips to drop in, allow the sacrum to sit in. We're doing pretty much no fuss about at work here. Just with that no strap position it takes care of itself in the upper body. What I wanna spend more time thinking about is open at the front of the hips, sacrum sits into its extended position, hamstrings are actively drawing heels to the body.
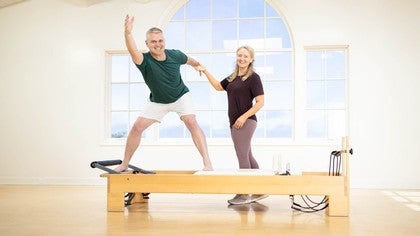
And one last repetition. And pause. Good. Extend the legs and we will step off. We have a little finish that we'll do beside the Reformer. So Andrew, if you'll turn and face the end of the Reformer for me in a small lunge.
So we're gonna have fingertips reaching just slightly above shoulder height. And using that lunge position, you don't need to straighten the front leg as you do this, but use the back leg to rise up. And wherever your fingertips are there, find the spot on the far wall, lower the back heel, but leave the fingers there, and it draws that fascia stretch as you come back. Rise up. We'll do two more this side. And the fingertips stay there.
So every time you rise through that back leg, you find a new spot. And pause. Good. Change sides. So fingertips start, the back leg presses you up into a rise, that hip is forward. Now leave the fingertips there, and you should see on Andrew that stretch of the back line of the torso.
As you're going through the movement, you've got a nice lunge through the front of this hip. Pause, and then bring both legs together, hip width apart, a little roll down just to finish, just one. So exhale, just let everything drop forward. Stay there for a moment, knees soft, head soft, head hanging, arms hanging. Let this all be gone.
Inhale into the low back. Then think of hamstrings drawing the pelvis down as you roll back up, stacking the spine on top of the pelvis. And thank you very much, Andrew. Thank you very much for joining us. That was your calm and centered Reformer.
Reach Movement Health - Playlist 1: Full Classes
Mention
 |
Sally Anderson (Teacher) |
 |
Tash Chedgy |
 |
Meg |
 |
Suzanne F |
 |
Kelly S |
 |
Rena W |
|
|
Lindsay T |
|
|
Olya K |
Comments


You need to be a subscriber to post a comment.
Please Log In or Create an Account to start your free trial.