
Premium Continuing Education workshop
You can view a 2 minute preview. For details, scroll down below the video.
Description
Objectives
Upon successful completion of this workshop participants will be able to:
- Describe the structure of a vertebra and the joints that connect consecutive vertebrae
- Name, locate, and provide the actions of key muscles of the spine
- Apply a schema to analyze the primary muscles used in select Pilates exercises, that can be used to develop anatomically-based cues and enhance movement performance
- Identify and provide exercises to help improve common spinal alignment problems and enhance core stability
- Provide sample progressions and modifications for select Pilates exercises that enhance effectiveness and promote exercise safety
About This Video
Transcript
Read Full Transcript
Chapter 1
Introduction
Welcome everyone. As you know today our topic is spine anatomy and just as a little intro, my name is Karen Clippinger and I'm a professor at cal State Long Beach where some of my classes include anatomy, PyLadies and body placement. And I wrote a book called Dance Anatomy and Kinesiology. And coauthored is anatomy. So you can tell, I think anatomy is really important and I hope you'll find so today. So some of the, my goals for today in terms of how this information can be useful is that if you understand more about the anatomy of the spine, it helps you to understand the goals of certain exercises and be able to give more specific anatomically sound cues. It can also help you, uh, notice and be able to give effective corrections for common alignment problems and to understand more about the risks associated with certain plot, these exercises, and what kind of modifications you can give to lower those risks.
Lastly, we can look at that whole issue of effectiveness. You know, how can we really get the gains that we want in our bodies or in our clients? And what kinds of progressions can we go or use over time, right? So that we can achieve those. I will say that all the graphics I'm using today are from my text and have some of you get tweaked and interested in going into a little more depth. I think you may find this a helpful resource.
So we are going to start today with looking at the structure, right of the spine. And so looking at the joints themselves, the Vertebra, the bones, and then add that whole element of the muscles and how we create movement. Next we'll look at alignment and that challenging issue of core stability that comes into play. And then taking that information, applying it more towards specific exercises, employees and looking at both effectiveness and risk. And lastly, coming back to practical, where we'll start on the mat, focusing a little bit more in alignment and then go to some of the apparatus to look at the issue of effectiveness and risk.
Chapter 2
Bones, Joints, and Movements of the Spine
So starting with that structure, right? So if we begin, we have the bones that make up the spine or the vertebral column. And the name for tuple column comes from the fact that those individual bones are called Vertebra, right? Vertebra, singular vertebrae at plural. And so we have 33 consecutive vertebra and we can take these vertebra and divide them into regions. And so this upper region and the neck area is called what?
Cervical and how many vertebra? Seven. Exactly. And then next we have that area that the ribs attached to and that is the Rassic and number 12 and then as we go down to the low back, we have lumbar number is five and the safe room and the cost of GL, sacred cost, the dealer often kind of group together. And we have how many sacred, say Krull five about and three to five cost. Six who have been used for sort of an average. But there's a lot of variability in those.
And in the adult they work a lot together, right? So we really emphasize the vertebra above as being those that are the most important for creating movement of the spine. And if we look at that ordering of the Vertebra, as you can see in this drawing, we start from one and go down. So c one is the first cervical, right? C seven and the last t ones, the first thoracic, et Cetera, and go down. And so that gives us the logic of how we can think about bird grove and we're looking at our clients and saying, oh, they're really rounded, right?
And it's right. The apex is right around, you know, as it helps you to think is it high, is it middle thoracic or is it low thoracic in terms of what types of exercises, what types of cues you're going to get. So looking a little bit more closely at the Individual Vertebra itself, right? We have a cylindrical portion of the vertebra that is right here, and that is most important for transmitting the weight of the body, right? So it's the major weightbear up the body. And then we have a partial ring that goes back here that we can call the neural arch and notice that it helps form an opening of foramen and when consecutive vertebra align, that forms a canal that the spinal cord goes through.
So it's very important. That ring is very important in terms of protecting those vital structures, right? The spinal cord. And also this neural arch right here has seven processes which come off of it. And so the one that goes directly back as the spinus process, and that's when you can pell pain right at the very back of your neck. And as you go down, it sometimes get sore when you do mat work if and that area.
And then if you imagine going deep under that, we have processes that two paired processes that go to the sides and those are the transverse processes. And then we have two superior and two inferior articular processes and articular means articulation as joint. So these are the processes that are really important for joining consecutive Vertebra, helping those Vertebra Act together as the spine or the virtual column. Now when we look from the side, there's another important opening, right? And that's this opening right here.
So there's a notch on this vertebra above and a little notch on the one below. And that's opening allows the spinal nerves to exit and go to the important places that they innovate. So that's a very important area that again, in some, uh, some people that sometimes get to narrow it or [inaudible] and we have problems that can be created by the pressure that's put on those nerves. When we look at the joints that connect these 33 Vertebra, right? The one that is between the bodies of the Verba Vertebra is the intervertebral disc and the intervertebral disc can be thought of as a very important shock absorbing structure.
And basically it has an outer portion that is made up of rings, annulus fibrosis. So annular rings, fibers, rings that give strength to that desk, right? And then then inner nuclear portion right here, and that inner nuclear portion has a very high content of water. And so maybe 80% water in a young individual. And so what you can imagine is when you're weightbearing and you push down on that, that pillow of water goes out and then this fibers rings help contain it, right? And so it allows it to operate very well. So each night when you go to bed, you're a little bit shorter, right?
Then you were in the morning because the water, you lose some water content with lots of standing and walking and moving. And then when you rest and you're off your feet or you lay down halfway do during the day and you rest, we start getting the water starts going back into that. And so it's a really dynamic structure that's very important in our spine. And then that neural arch, so that's the body's right. The neural arch is also connected, right? So we talked about, it's easiest to see here that the process from the inferior, the lower process of one vertebra connects with the upper process of the vertebral below and those hooked together.
And you can see them right here, right there, yes. And they form gliding joints, which will allow just a little bit of sliding motion forward and back different directions. And they're quite different in different regions of the spine in terms of their size, their shape, the, the way that they angle. And what this allows is for different movement characteristics in different regions of the spine. So just as an example, if we look at the thoracic region right here, their architecture is such that it allows a lot of rotation to occur. But if we look at the lumbar region, you can see that there's a more vertical alignment of those processes that are gonna limit rotation.
And so we have less rotation that occurs in the lumbar spine. So basically, even though the movement is quite small [inaudible], it's very important in terms of determining the extent of movement that can occur between individual
It can be really important for rehabilitation. Trying to figure out why someone has less movement here and more movement there. That's creating pain. I a lot of physical therapists work with those kinds of issues, but for movement analysis and that focus of today, right? We're going to be focusing on the larger movements of the spine and these movements we can talk about relative to anatomical position and anatomical position member is a position where the feeder Ford and the palms are facing forward and you're standing erect.
So when we think about movements of the spine, it's relative to the standing position. And that's important to think about when you try to relate it to other exercises is that we can take this position and move it in space. We might be moving to line supine, but we would still consider this motion of going forward flection, right? And so we can define those movements as when you go forward from anatomical position, it's called spinal flection and then anything back is extension. Even in movement and else we even consider a hyper extension, right?
Which is extension, past anatomical position. We would consider that extension. And if I were to go this way, we would call it lateral flection. And this way would be right. Right. So if you are the person, right, it's your body. So this would be right lateral flection and any movement, this direction would be left lateral flection. Exactly.
And if I rotate, this would be right rotation. So it's by the cop, right? The upper portion of the spine. And this would be left by what way your spine is facing. Right? So those are the movements of the, as a whole of the spine. But one of the things that we're going to be playing with today as we look at plots exercises that in some cases we may want to stabilize, for example, and not have the lumbar spine move and just have thoracic extension, right? Or The opposite as we're doing flection, less thoracic flection, right? And more lumbar flection.
And so even though we're using those generalized terms, it's important to realize, again, that we have all of these joints and the spine and all of these regions in the spine and so are, we can get very creative right in the ways that we use it. Many of us have favorite habits and favorite postures,
Chapter 3
Key Muscles of the Spine
That make up the spine or the vertebral column. And the structure of the joints is important for stability.
But now we also have ligaments that help hold these vertebra together. And they're quite extensive. We won't go into details, but just to say that there's one that runs down the front of the body, the back of the body of the Vertebra, and then there's all kinds of ligaments that connect the various processes. So that stability of the structure is, is markedly enhanced by the ligamental structure. And it's important to realize that when we look at each of you in here, right? You're gonna have a different ligamental structures. So some of us, we'd go forward and it's like that's it folks, right? You know, and it might be tightness in muscles too, but it can also be ligamental. And then we've got the gumbies, right? Her, the extreme, the contortionists, right? Where they can do amazing ranges of motions, right?
Where their ligaments are hyper mobile and aren't stopping them in the same way. And each of those has its own challenge, right? So that Gumby has to work on strengths to be able to support the spine, to give it more stability. And that tight individual has to work on getting healthy, normal range of motion, and then the primary focus of today, right? The other thing that we can change the most are the muscles themselves.
And there are many muscles that are important. And I think one of the things that's really interesting and unique about the spine is that it's not just direct connections, but it's also indirect connections. And we'll look at these muscles more closely, but just as an idea of what I'm talking about, we have some muscles in the spine that directly connect to the spine, right? They might go from transfers process to spinus process. And so when they can track, they're going to directly cause motion in that Vertebra.
But then we have other muscles like the abdominals that attach from the pelvis to the rib cage. They don't attach onto the spine at all, right? But when they contract, they're going to have an effect right on the spine. And so that's that indirect effect. And one of the reasons that the activation and the resting length, this whole front of the body is only connected by muscle, right? It's not like the back where we have the bony connection.
So if your abdominals are weak and you don't activate it much, you can be like here on, that's like, oh so comfy. Right? And then someone else can be like this where they're really short and they do a ton of ab work. Let's say they're a swimmer and they do it kind of crunches and they don't do a lot to stretch, stretch out the other way, and it really tight in there in this posture. Right? So it's a very, it's a very mobile kind of area in terms of not just strength but relative strength between the front and the back muscles and then activation, how you activate those muscles. So we'll start by looking at those muscles that are on the front of the spine. These are the ones that most of us are really familiar with, right?
And the first one being the Rectus Abdominis, right? And the Rectus Abdominis is the one that runs rectus means straight, right on, straight up the abdominal wall. It's paired. A lot of people don't realize it's paired, right? So there is really a right and a left rec die rectus abdominis and it is kicked rise by those cross striations, right? The six pack. And yes, there are some people out of eight packs that have an a fourth line going across too. So those inscriptions, those fibers, inscriptions, give that contour for that. You see with some people where you get that exaggerated development.
But the key thing I want you to think about now is that central location, right? That they're really in the middle, this middle area here. And so when they contract, they're in a perfect position to create spinal wet flections spinal flection. And then if one side contracts that can assist a little bit with spinal lateral flection, right? But they're not in a good position to create rotation. And so that's a really important distinction between those and the oblique muscles that we'll look at next.
And so if we started that external oblique of, the first thing I want to really point out is look how high that's attaching onto the rib cage, right? So external internal are quite different. So this external leak comes way high onto the rib cage and notice that it comes right quite far to the back too. And so I think a lot of people conceptually think of the abdominals as being on the front, right? But these obliques really go far to the sides. And this external oblique done is coming way up here on the rib cage. And we can think about it's line of pole as being like a v between the right side and the left side. And so with that line of pull of both sides contract, it's going to create spinal flection. Spinal flection. Exactly.
And if one sides contracts spinal lateral flection, same ways. That term meaning what? That we're going to, the muscle that's located on the right side is going to produce right lateral flection. It's going to produce lateral flection to the same direction as which on which it's located. Right. And but the difference, the distinction between this and internal obliques is when son, well the right side contracts it produces what kind of rotation? Left
This is ones that it comes so high in the rib cage and you'll sometimes feel soreness, right? And when you've done a hard workout with your abs, you'll feel soreness up here. That can be abdominal. So not just intercostal muscles. And then in contrast, if we look at internal, right? If we look at the internal obliques, notice that they go all the way to the back. They actually connect into the Fascia that's located in the low back region. And so they come all the way back to this Fascia and they just attached to the bottom border of the ribs, right?
So they don't come way up high on the rib cage. And I think that's helpful when you think about biasing towards using one muscle versus the other. And so again, thinking about their line of pull, we can think of the opposite that they're like an inverted V or mountain top. So when both sides can track together, it's going to create flection again and again. Lateral flection, same. But the difference is when it contracts, it produces rotation to the same side rotation to the same side. So let's take a moment just to, to try to feel that difference.
So if we think about doing abdominal exercises, some exercises that we're doing today, one of the ways that we think about distinguishing to challenge the oblique muscles more is to add rotation or lateral flection, right? And so if we think about adding rotation, let's just go into it, which is where you're sitting into a little bit of a flex position and have everyone rotate to the right. And so as you rotate to the right, if you do it really pretty far and keep a little bit of flection, most of you are going to feel it more on the left side. Do you feel that? And so what a bleak as at left external oblique, right? And so the left external bleak is stronger, more, a little bit more powerful, but at, but the internals considered really important for posture. So I want you, while you stay in that same position, now think about taking the mid line right that middle of the abdomen and pulling it towards your right hip, right?
Your right ass or the right side of your body. And hopefully you now feel the internal oblique yes. And come back and try that again. And so now I want you to have that feeling of a column, right? We, we're going to add the back to it, but for right now the front portion of it, so as we rotate the left external going right again works and then take it further with that right internal and you should feel that you can go further and that you feel the whole wall working on the front. Yes. And come back.
And that's a really important point that I want to emphasize as we're doing exercises today is to not leave out the internal belief, right. And two that we can get more benefit from exactly the same exercise. If we add that extra element of feeling, that internal oblique contributing by pulling towards the same side, the muscle that's gotten so much press right and that transverse abdominis has, is considered really important in injury prevention, really important and plays a lot of systems. And one of the reasons being, because it is a postural muscle, it runs transversely, it runs across this way, hence its name, transverse abdominis. And so can it create spinal flection? No. And so this is really important to realize. So scooping, doing a curl app, doing, you know, a single leg stretch doesn't mean your transverse abdominis is working, right?
And that's one of the challenges is how do we get that transverse abdominous to fire. So some of the things that we commonly do in plots are to think about pulling the abdominal wall inwards, right? And that has been shown that when you fire the transverse abdominis, basically the fibers slide such that they narrow, right? So they act like a course that they, they narrow the circumference of your lower abdominal region. So they really do act to tighten that and they help them stiffen the sacred ILIAC joints and help provide support to the low back.
So they do have that wrapping kind of motion. And so I want you to take that image for just a minute and do a scoop, pull those low abs in. But now rather than just thinking of pulling them, then I want you to think about drawing them to the sides and wrapping them all the way to the back so that you shorten that distance as you wrap around. And hopefully you can feel them working more on the sides of your body. Right? And then let it go and try it one more time. So you're scooping in. And now from here we can scoop in with internal obliques and external weeks too.
So I'm trying to get you to fire a little bit more of that transverse by focusing on that horizontal pull. So now you're wrapping both sides around narrowing, right? Like you're overlapping as you go to the back, narrowing that circumference and hopefully you can feel that s cylinder type feeling of that transfer. Subdominant so that's one way that I like to add in addition to of scooping I think is really helpful and itself too. Or just the idea of thinking of a hand of pulling that wall in towards your spine is as helpful.
The idea of forced exhalation or the, the, uh, is one of the rationales for that. Uh, plebe sometimes uses to emphasize an exhale and certain phases of a movement, right? To help try to activate that transfers. Abdominous. So there are lots of ways of activating our, trying to encourage activation, but it's important to realize that it's not as easy as we might think and that we can, we can flatten that wall with the obliques as well as the transfers, but still try to think about that concept that doing flection by itself isn't enough to get that transfer. So we really need to think about cues that will help encourage that activation. Now the last muscle that I have listed here in terms of anterior spinal muscles is not an abdominal, right? It's not an abdominal. It's uh, but it's located on the front of the spine. And I have it put in here because it is important in terms of the function of the spine.
So the Elio sauce is connects to the sides of the lumbar spine, right? The another portion of it connects to the whole inner part of the bowl of the pelvis, that Ilium, and then they come down and attach to the inside of the upper femur on this little projection here, right? The lesser trow canter. So think about that idea that muscle is coming from here all along the sides, the pelvis and then down to attach there. And I think you can imagine that if this is the moving in and this is the stable end, that it can create an anterior pelvic tilt, right? And it can increase the arch of that low lumbar spine.
And so one of the things that is really important in terms of plotting is to realize that whenever we're doing exercises that use the hip flexors hard w which would be teaser type exercises, hundreds, any double leg stretch, anything where both legs are out there, the hip flexors and the Elio. So as being one of the strongest or thus strongest of the hip flexors are working to hold those legs up there. And that if you don't stable at stabilize adequately with the abdominals, they're going to naturally pull you into an anterior tilt and make that low back arch. And so even though those exercises be really valuable
So some people hold, and I, and I think there's some good logic to this, that, that Iliopsoas is also important for helping to maintain the lumbar curvature of the spine, right? And some, there's some interesting studies looking at the electrical activity. And for many people that Iliopsoas is working whenever you're standing, the abdominals may not be right, that the back may not be, but that Elio, so as is, and so it's, it's felt to contribute to maintaining the normal curvature of the lumbar spine. So those are the anterior muscles, right? And now we're going to switch and go post. You're late to the back of the spine. And if we look at these muscles, the most superficial and the most powerful is the rector spiny, right?
And it erects the spine, right? It brings the spine up so it name tells you its primary function and very powerful extensor of the spine. And it is arranged in three columns. So if we start at the middle, we have the spinalis that is the most medial right next to those spinus processes right here. And then we can go out from there. And we have the longest snus, the longest miss getting its name from and being the so long it goes all the way and attaches actually up onto the base of the skull. So it's very long. And it's that middle column. And then Leo Castelli, Leo meaning what Ilium? The pelvis is part of the pelvis, costal meaning ribs.
And so it actually has connections onto the pelvis and onto the ribs. So it goes quite lateral, quite out to the sides. And so when we're doing back extension, when we work on that today, I want you to try to feel that difference. And just now as you're sitting, just a small arch to the back. And first think about right close to the spine that you're bringing each individual vertebra right by the spinus processes closer to the next Vertebra. And now add in, go by an inch to the side, and now think of pulling from there and go a little bit more into an arch.
Now go out, right so that you're going onto the ribs and think about pulling the rib cage closer to the pelvis and hopefully you can feel those different columns being activated a little bit more in those movements, right? So they're quite extensive. They, they really fill this whole guider, right?
Same but the different than the more superficial oblique. In this case, if you think about as it goes up, right, that the logic is as it goes up, it's going slightly out towards that rib cage, right? So the right side is going to produce rotation to the same side, right? Right. Side produces rotation to the same. So erector has rotation, same where's the next two layers have rotation opposite. So we have similar concept to what we talked about with the obliques where we can use that idea to help us to fire some of those deeper muscles that we might miss if we're emphasizing primarily using that erector spinae.
This next group is the semispinalis and it gets its name from the fact that it doesn't extend all the way up the spine and notice that it is the Rassic region and above. And so this is a muscle group that I really like to emphasize. Not that you're going to be using it alone, but the idea that there actually is a muscle that's just in the thoracic that doesn't go into the lumbar spine. Right? And so when we start working with spinal extension, where I'm trying to encourage you to use less of your low back sensors in the s and less arch in the low back and get more motion in thoracic spine, you are going to be encouraging activation of these as well as some other fibers of the rector, spiny and and others. So it's an important muscle group that I think is often underestimated and it's considered to be important in terms of posture. And something that I'll throw out that some studies show that we're going to use today is that when your arms are to the side, it appears to activate, not only is it produced more activation the spinal extensors in general, but it appears to activate these deeper ones a little bit better than when the arms are down here.
So we'll do some exercises where we bring the arms to the side or we bring them overhead. So you can think about in terms of classic plays, right? Pulling straps, right? So the t position, it would be an example of an exercise that fits with this kind of principle where we can feel those muscles activating and trying to get those muscles working. These muscles, as I mentioned, are in
And so these muscles are really noted for local stabilization and movement, meaning what? One Vertebra moving relative to the next or two vertebra relative to the one above or the one below. And these muscles, just like the transverse Abdominis, have gotten a lot of press and a lot of research has been done, particularly with the multifidus that belongs in this group and has slightly larger, it's shown here slightly larger slips than the other ones. But this muscle has been shown to be particularly important for posture, just like the transverse abdominis. And so when someone has an a spine that's functioning well, that's normal, or they don't have chronic back pain or chronic injuries, then we'll have that before you move your arm, before you move your leg, without even thinking about it. What happens? Transverse abdominous fires and then multi-fit I fired to help stabilize the back, right?
And then when you have chronic back injury that gets disrupted and they no longer fire at the right timing or the right amount. So that balance in both the transfers and multipolar dye gets thrown off. So these muscles are considered really important too. And we will. One way that you can think about using these is as you're sitting to just take your fingertips and place them at the base.
So if you find your sacrament is take your fingertips, one on each side of that spinus process. All right, and now as you're sitting here purposely slumped back, ah, comfort, right? Hang in the back there and now right where your fingers are, you're going to think about lifting up, not with your rib cage going forward, but really right at the base of the Sacrum, lifting up towards the ceiling and hopefully you feel some contraction right under your fingertips. Then when feel that, and so that's one of the areas very low there that the Multifidi, I actually come close to the surface, a higher up there underneath and let it go again. And now really think of lifting really low right on that sacrum up towards the ceiling. And so this is something that I like to really encourage when you're doing sitting arm series or any kind of exercise that we're doing, that we're not just thinking about using our abdominals, right? But that we're lifting low abs and low back at the same time to get that ideal position in the support of the spine on the front as well as the back. And do you think that's a weak area? Yes, really weak.
So you have to be careful as you start trying to add that in and do it for a little bit and then let it go. Do it for a little bit and let it go. Because it is an area that a lot of us aren't used to using. Moving to our last muscle that we're looking at in terms of the spine or the lateral muscle of the spine is the quadratus lumborum and quadratus lumborum. And this muscle, as you can see, attaches to the top of the pelvis, the ilium there, and the lowest rib and then the sides of the spine. So it's really deep. I mean, we know we can't see the other muscles over it, but it's underneath all those spinal extensors that we talked about, right?
So it's B, it's between them and the transverse abdominous on the front. It's deep inside there and it's positioning puts it in a perfect position to create lateral flection of the spine. So it's a really powerful lateral flexor of the spine. It also, if you have, if you're doing something like on the ground where you're lifting up, it prevents the pelvis from dropping, right or in walking movements. So it's also very important for basically keeping the distance of the pelvis relative to the rib cage. And so this muscle is notorious for going into spasm.
Some of you may have had that unpleasant experience, uh, with, uh, lots of conditions, but sacred Iliac problems and low back problems that it often goes into, into spasm. And so one of the things that we want to think about as we're doing our spine strengthening type exercises is to include lateral flection. And when we include that lateral flection, not only do some that's biased towards that banana position, which will bias towards using more of the obliques, but also some pure lateral flection type exercises so that we can really be activating that quadratus lumborum more as well
The most superficial of the ones that run at an angle is an external oblique. The one underneath that is internal oblique and the one that runs deepest and crosswise is transverse abdominous and transverse of dramas we talked about as just posture. It doesn't participate in the movements that we're talking about. Maybe rotation, but not certainly not flection, but the others share which two common actions. Spinal flection, spinal flection and lateral flection saying. Right. And then the distinction, the difference is external bleak is rotation opposite and internal weak is rotation saying rotation. Same.
So we want to use those. Yes. Question. Oh, so the question is where do the obliques and the Trans averse attach in towards the front? Right. And so basically, I don't have a drawing of it here, but there is the [inaudible], they all come to the Linea Alba, which is a fashionable band in the front. Right. And what happens with the transfers and the obliques is when they start coming towards about where the rectus stops, they form fiber sheets and some of those sheets go behind the rectus and some of them go in front of the rectus abdominis. And so they help form the sheath that covers that rectus. So it all is all Fascia and then it actually in the really low portion of the pelvis, it gets more complex in it dives a bit.
But generally what we see is that some go behind and some go in front of the rec just and they help form a sheath that, that rectus sits within. And so it's uh, the of fashionable connections that's quite extensive so that it's, they, the muscle fibers are lateral for the obliques, whereas Rectus, they're centrally located. Does that make sense? Yeah. And then in the back we talked about that the transfers in internal go to the fashion the back, whereas external does not, right? So it's a uh, complex but logical interplay. If you think about that idea of that they have different functions but they need to work all together, right?
All of them produce lateral flection. Same. And the difference here as erector spiny is rotation, same. And the other two is rotation. Opposite, right? So let's take that same concept that we did with the abdominals for just a minute and write from here if you rotate. So and I want you to not rotate neutrally but actually arch your back a little bit. And if you rotate to the right, many of you will probably feel your right side working more. And that is erector right now as you see there, I want you to think about pulling the spinus process of the middle of your spine towards your rib cage on the left and rotate further.
And hopefully you now feel the muscles on the left side working. And that's going to be semi and deep, right? And then come back and repeat that again. So just rotate normally with that thinking about it. And most of us use more of erector and now from here, spinus process towards the rib cage on the left side and hopefully you feel that sensation on the left now working.
So same concept that when we start adding rotation, if we start adding feeling both sides of the spine working, no matter which way we're rotating, we can get more benefit from the same exercise. And I think you'll, it'll be interesting for some of you may find that you have a bias. So for example, when you rotate to the right that you feel your right erector working more, when you rotate to the left, you feel the different, the same side working right that you, it doesn't switch over so that you'd have one side of your back that you fire more readily than the other rather than being consistent in terms of this idea.
Chapter 4
Ideal Spinal Alignment and Common Problems
So now that we've talked about the muscles, let's take our next step and talk about ideal spinal and some common problems that I'm just picking a couple particularly common ones to look at. And so the concept of ideal spinal alignment comes from Kendall and Kendall's work a long time ago.
And it's quite simplistic way, but I think a very practical and helpful way of thinking about all of these joints. And basically what we're looking at is that we have four alternating curves, right? For alternating curves. And the idea is that those curves are ideally balanced so that we don't have one that's really exaggerated and one that's less, or that we don't have two that are really exaggerated, right? But that we have a balance so that basically the center of mass of the head is over, approximately the center of mass of the trunk is over approximately the center of mass of the pelvis. Rather than that we are back or forward relative to that.
So there's kind of a couple different concepts, inner plane here. And so if we look at these curves, it's, it's helpful to think about direction. So here is our cervical and it's the same direction as our lumbar. And which way is that? If we talk about Convex, right? Convex. If you can think about is the idea of which way is that the front of it pointing, right? Then it's interior, right in the lumbar and in the cervical.
And what about in the thoracic? He's got a flat one, but it would be post your ear and sacred classic jeal would be posting. So do you see that alternation? So this way, this way, this way, this way that ideally, again, we have that balance of those different curves. So what I want you to think of for just a minute before we move from this concept is these directions have really important implications for exercise. So if I'm doing prone back extension, I'm laying on my stomach and I'm arching my back, can you see that? The same direction as the neck and the low back.
So it's very easy when you go to arch your back to primarily do it with your neck and your low back and just kind of miss this region in the middle, right? Cause it's going the opposite way. It's logical. It's not that your body is just going, okay, I got it, I'm gonna use the area that's easy to do. And so in plots we emphasize what trying to distribute that arch and trying to get, it's not going to be the same amount, but activating those thoracic extensors more, right? Emphasizing that thoracic extension while we do it, not only for the idea of including the whole spine in terms of our attempts to strengthen and work with mobility, but also the idea that many people with aging tend to get Kyphosis, right? That increase in that thoracic curve.
And so it's very important that we do exercises that will help counter that. So that's the logic for arching, right? But what about for f for going the other direction? If we're doing a curl up, right, we're doing a curl up, where does, is it easiest to do it? Thoracic spine, right? And so we'll, we'll, we'll see that we get a lot of flection up here and then what for a lot of people, nothing's happening down here. It's particularly if they're tight, right?
That that low back is staying and it's a lordotic position or maybe it goes a little bit towards flat, but we're not getting as much motion as we want. And so one of the things that we'll be working with in terms of queuing is to try to distribute that movement more. But I think it's important to realize it's not going to be the same, right? Because these curves are going different directions. But a little bit of movement means a lot in the lumbar region when we're going into flection.
And a little bit of movement in the thoracic means a lot when we're going for extension. And that's what I want to emphasize. And now if we look at the concept of the spine and these curves, w do you want to throw in just one of the aspects of the pelvis, right? Looking at pelvic alignment in forward, backward direction. And so one of the ways we talk about that optimal alignment is that the Asi Es, right? These projections on the front of your pelvis right here, that they are vertically aligned with the pubic synthesis right on the front so that we could put a piece of paper and it would run vertically and all of those points would touch. And in contrast to that, if the Asi es are forward, all right, what does it tend to do with my low back? Make it go into further extension or hyperextension. Right? And if, and we call that an anterior pelvic tilt, right? And it's often accompanied by that excessive arching in the back.
And then opposite this would be posterior pelvic tilt. And what does it do to my low back? Tends to flatten it or reduce the degree of extension, bring it towards flection. So the, it's really helpful and it's done a lot in plotting is exercises to link, right? Those movements of the pelvis and the spine to facilitate the desired movement that we want. So if we look at a couple of those classic postural problems, we, lumbar Lordosis is one of the first ones, right?
Because it's thought to be linked in some cases, not always, but can be linked with low back problems. And it's been shown, for example, in individuals that have market lordosis that those back extensors have to work much harder than in a neutral position. So the, the logic being what that if and that basically my body's falling forward and I have to use those back extensors to bring it back up to keep it from falling forward. And that's thought to be one of the reasons that maybe the back muscles fatigue more readily and that person may be a little bit more susceptible to problems, whatever the, the uh, reasons. What we think about trying to improve that condition, right? In that posture, we're basically taking this distance between the pelvis and the rib cage and we're making it larger, right? So what muscles can make that smaller abdominals. And so we're emphasizing in terms of strengthening that we want to strengthen those abdominal muscles and specifically think about bringing that pelvis closer to the rib cage, right?
So bringing that bottom of the pelvis up to its neutral alignment. And in some cases this ribs slightly down and back to its neutral position depending on your particular posture. We also look at that Elio, so as here, right? That's running from the spine and attaching to that upper part of the thigh bone, the femur. And when that's tight, it can contribute to that one more lordosis. And so stretching those hip flexors and the low back, if it's constantly in this position and those muscles are working a lot, right?
We can easily get to a position where those muscles are getting tight and short, not necessarily strong, right. But uh, tight over time. And so the other recommendations strengthen abdominal stretch, hip flexors and low back. And without digressing too much, I would just encourage you to look at those more closely in yourself or with clients and that in many cases I think you'll find that one is more dominant than the other, right? So you may have someone, I've worked with people for example that are quite strong in their Bellomo's but their hip flexors are dressed really tight and it's the major problem. And then vice versa. I've worked with some people that are really flexible in their hip flexors, is not an issue, doesn't need to be stretched, but their abdominals are or weak or are not being adequately activated. Basically.
We're looking at that idea then of strength in and abdominals and stretching the hip flexors. Right. And the low back for many people in where I was starting to talk about is the idea of activation, right? That that activation is very important. And so what we see with posture in general is that if someone is used to stabilizing with their back muscles, right, and that's the way they balance and that's the way they lift that you can do lots of abdominal exercises and you can do those stretches and you won't necessarily change their posture. Right? And so very important part of this whole process and one of the reasons that I think that postural alignment fits so nicely into the plots arena is that we want to focus on the details of not just strengthening, but how has that person then use stabilizing as they're doing their sitting arm work, how are they stabilizing as they're working their legs with legs circles, right? So that we're reinforcing, not just strengthen but reinforcing an appropriate activation of core muscles so that we get the desired movement that we want.
The next posture that I want to talk about is kyphosis and Kyphosis is increased upper back curve, right? Thoracic curve. And this is can be quite market and we see with aging than it sometimes can be more structural. But right now I'm talking about more functional something where someone can actually straighten up, right? If they're given that cue, if they're given exercises, and so the general recommendation of what we're going to be focusing on today is the idea of using the upper back extensors. So if this curve is increased, if I flier these muscles that have this direction of movement, right, it will help reduce that curvature and help me achieve that optimal position. And in some cases, as I mentioned earlier with the swimming example, you see it sometimes with bodybuilders too, is that the abdominals can be tight, they can be quite strong and they can be tight and so we may need to stretch those and some people have rolled shoulders accompanied with it where stretching the shoulders can also be helpful. In terms of ACU, I think it's often helpful to think of that idea that you have a string at the middle of your upper back or wherever you're the apex of your curve is and you're thinking about lifting that up and forward towards the ceiling, right.
Rather than being in that collapsed position. Cervical Lordosis is a little bit more complex. So cervical Lordosis is simply described as an increased curvature of the neck region, the cervical area that's often accompanied by forward head. And what I mean by complex is you'll sometimes see that a portion of the curve is actually lessened as flattened and then another portion of the curve is increased in order to get that head right to the upright position. And we'll be doing some exercises that work on strengthening the neck flexor.
So it's, it's very, uh, parallel right to the Lordosis and the lumbar region that if we strengthen the flexors and stretch the extensors, it can help us achieve that more desired positioning. And try this with me once that as you are sitting where you are, think about your chin coming slightly down and back as you lift the back of your head up towards the ceiling or lift right behind the ears. It's another way of thinking of it up towards the ceiling and now feel the difference versus letting your chin go forward. Right? And feel was that Chin goes forward, that it gets shorter in the back and now try to lengthen that back of the neck as the Chin comes in and noticed that it changes your eyeline. And that's one of the things I find particularly challenging about working with cervical lordosis if someone's really used to that posture is that you have to readjust your vision, right?
Cause we do a lot of organization of balance and other things. By vision you have to readjust that position. One that Ha has been getting more attention in recent years and I think is really important and I included it because it's the opposite, right? Of what we just talked about is flat back. And so with flat back, we're looking at as a decrease in the curvatures and most classically the lumbar. Some people use it more generally, we're going to use the, the version of the lumbar curve is decreased. And this is is partly a relates to a genetics, right?
And so we see a lot more flat back in Asian cultures than we do in western cultures. For example, as we see more lumbar Lordosis and African-American than we do in Asian, for example, right? So there can be some genetics that come into play and what we need more information is a lot unfortunately of the research has been done on Caucasian western, uh, individuals. And we need to understand more about, well, if someone has different heritage, what's normal for them? When do we start getting into a situation where we're increasing the risk for injury or low back problems? But that means said there is some evidence that uh, a lot of, uh, individuals in Asian countries are having low back problems that they feel are associated with the tendency for this flat back. And that when you take, remove that lumbar curve, it's theorized to reduce the shock absorbency right?
And so it can increase that risk for just problems in that low back region. And similarly, some of the studies have shown that individuals that have stronger back extensor muscles tend to have larger curves than those with weaker back extensor muscles. So that gives some support that that we can change this, we can make some improvements with this by strengthening the back extensors. And here we're talking about not thoracic but what lumbar backer sensors and so it's interesting because so much and plot is we often deemphasize the lumbar so we can emphasize that thoracic, which is important for a large subset of people, but for this particular group of individuals we're thinking about, no, we actually do want to encourage strengthening that lumbar region and those low back sensors. And this fits into the whole concept that we used to view low back pain as being due to what inadequate abdominals and that that related to the abdominals being weaker than the back sensors.
And now research is showing that a lot of people with low back pain have weak low back extensors as well as weak abdominals. They may be tight but not necessarily strong. So we're having to relook at this and there's a big shift that I'm excited to see of towards including more extension exercises and looking at balancing the flection and the extension that we do in our own workouts as well as with clients. So strength and low back in some cases hip flexors can also help. We talked earlier about the Eylea, so at that concept and so in some individuals that can be included and that Q that we talked about of thinking about lifting right in the low back region rather than lifting just with the abdominal is where it tends to flat and that lumbar curve can be really helpful to counter this or to help improve this.
And last but not least, and something we won't go into today is scoliosis, right? And scoliosis is a curvature from side to side. The rest of the, these curvatures we're talking about are forward backwards, right, and sagittal plane. And this is a side to side curvature that's more complex beyond the scope of today, but I just wanted to include it because it an important problem that we see in terms of the spine. Reiterating what we just talked about, summarizing what we just talked about. When we look at different common postural problems, they can often be aided.
There may be structural components as well as functional components, but they can often be aided by strengthening certain muscles, stretching certain muscles, right? But again, that doesn't appear to be enough that we also need to be thinking about what improving someone's awareness. So they're aware when they're getting into this posture and after a while it starts not feeling comfortable. It doesn't feel like home, right? That it starts feeling better to sit in a more upright position. So that kinesthetic awareness and that retraining of activation and movement patterns is an important. And something that I really think is valuable, again in terms of plot is that yes, we're going to be focusing on certain exercises for the spine today, but then that you take those concepts of stabilization and what muscles we're trying to activate more.
And that would be integrated into exercises, working the legs, working arms, working other parts of the body too. And that's when we can really have a profound effect. So I want to step from this idea of more static alignment to concept of dynamic
Chapter 5
Core Stability
alignment. And what we often talk about as core stability, right? And this is an area that's really catapulted, right? And in the last decade in terms of popularity, it's being talked about and in Rehab and injury prevention, it's being talked about in the fitness world, all different arenas.
And again, historically we initially emphasized achieving core stability through the use of the abdominals. And there are three primary theories of how those abdominals can help protect the spine. And the first one is called intra abdominal pressure. And as its name suggests, what we're thinking of is that when you tighten this whole cylinder of muscles, right, you tighten those abdominal muscles, it fills that cap, turns that cavity into like a fluid filled balloon. And if, if you can create enough pressure in that cavity, it can help support, right? The weight of the trunk. So now when you transfer the load from here to your pelvis, it's not just going through the spine, but it's also being supported by intra abdominal pressure and some early studies that looked at potentially unloading the spine by 25% 30% those kinds of numbers.
So it's not 90% but it's also substantial when we look at particularly things like lifting a heavy weight or doing types of movements that are associated with injury that involve large forces. So in recent years, some people are questioning whether w the abdominals can really generate enough intrabdominal pressure for this to be operative and still in discussion while this leave it there. And so the second theory that has gotten sort of increased popularity in recent years is the sheer reduction as sheer as a sliding force, right? In this, their sheer reduction. And this fits really nicely with a lot of the cues that we use in plotting to it. And this is the idea that if you think of this low area right here, right? The more you arch that low back in this really low part, this vertebra wants to slide forward on the one below it.
And this one wants to slide forward on the one below it. Up here it changes, right? But it's really looking at this low region, which is really important because about 80% of low back injuries occur between the last lumbar l five s one right? Written that really low area. So that's an area we really want to think about protecting. So if we now think about not just creating a ball here by tightening, but if we think about pulling that wall in so that it lengthens right that lowest lumbar area, they're not totally removing the curve. We still want a functional curve, but we just are giving a little bit of support to that very low area of the lumbar spine. It can reduce that sliding tendency of those lower vertebra and give support to that area that's so vulnerable in terms of injury.
And so that's that theory. And the third theory, which is even more controversial, is the [inaudible] Lumbar Fascia tensioning theory, right? And this theory is, its name suggests, is that relates to this special structure that we talked about, that the transverse abdominous and internal oblique come into. And so this theory holds that when you tighten those abdominals right, it's going to now make that fashion the back become tents taught, right? And by making that fast, you become tense, are taught. It can help provide even more support to that low back region to the spine in general. So a lot of people that are doing by mechanical models and and research in this area don't see them as mutually exclusive. And I agree with that.
So it's very possible that multiple of these mechanisms work together and in some types of movement, one might become more primary than another. So I think they're all helpful to think about in terms of generating cues in the way that you would think about queuing yourself when you're doing something rigorous or queuing a client underlying concept, whatever of those three or combination of those come into play is if you strengthen the abdominals, they can help protect the spine more, right? So one of our goals is just simply strengthened, but it's not any abdominals. The rectus has been shown to not help in the, in these principles we're talking about. And so we're looking at particularly the obliques and the transverse.
And so how would we do that? Emphasizing rotation and lateral flection type exercises are two easy ways to incorporate that concept. And then the second side that we use a lot in plots is the idea to queue to activate the abdominals just prior to a rigorous movement. Right? And so different people have different ways they like to talk about it, but let's say that you're going to do a single leg stretch. I, what do you think about before you reach that leg away, is either something you might use the imprinting idea that you're pulling the abdominals in and actually imprinting, thinking of pressing your spine into the mat. Others may use a, just the idea that you're pulling up with the abdominals that just prior, some might use the scooping idea that you're scooping in, but it's that idea that you're firing the abdominals prior to having that low, heavy weight. Right. Of your leg going away, which is gonna very easily make your low back arch. And so
And so the expansion has been that we no longer see it as just being abdominals, right? So the abdominals have been given too much credit for all these years. The ass, they are important, they're vital and a lot of us really need to work on them. But there are other muscles that are very important to including those back extensors that we just talked about. So one of the ways that core stability can be defined that like is neuromuscular control of the lumbar spine and pelvis, right? Vital for protecting the spine. So it's not saying abdominals, it's not same back extensors is just talking about that idea that, and that involves a nervous system as well as the muscle so that they're having to be activated in a way that is going to protect the spine.
And this is for skilled movement, right? And so you see someone that has good core stability, what do you see? You don't see a lot of compensations, right? As, as let's say they're doing chest expansion, you don't see this, right? What do you see is that they are stabilizing as it just abdominals? No, if they just use abdominals, they'd go into flection. Right? And so it has the backers sensors have to work with those abdominals and other muscles at the hip. It's to help maintain that position.
And so I think it's, it's really helpful for us to really expand the way we think about core stability from just thinking about abdominals and thinking about that whole column of muscles as we go all the way around. Right. And so sometimes the analogy of ropes, the idea of the spine with ropes being attached to it, like on a ship, right? Mast. And if you just pull from one side, it's not stable, right? But you have to have a balance of those ropes in order to provide stability. And once your spine moves in one direction, it will topple unless you use the rope that's going the opposite direction. Right.
That being reinforced often by some of the other ropes or lines to another way of thinking of it is what I have listed here is to think about it in terms of the movements of the spine, right? So if we think about the movements of the spine, if we think of one leg or single leg stretch, right? If I'm doing this type of motion, whichever version I do have it right, is this flection extension or lateral flection or rotation? Black Shit, right? And so I'm using my abdominals primarily isometrically in this position, but they're really particularly important for the stability, right?
As I change my legs to prevent the back from arching or the pelvis from anteriorly tilting, right? So we can think about some of the exercises that being an example work well to train stabilization towards the abdominals. But now what if I go to double leg kick, right? So in this exercise I'm going to stay lifted. If I am doing this exercise where I'm coming back and I am going to arch my back and lift my legs, what are we emphasizing?
Yes. Back extensors. And yes, I'm co contracting my abdominals to prevent excessive low lumbar, but I'm really working on that strength and stability, right? Of the back of sensors. If I were to do a Sideman, what is it? Lateral flexors, right? If I were to do a spine twist, right? Rotation, right? And so that we're thinking about within our programs that we're doing on a regular basis that not only are we making sure that we're doing movements for each of the directions of the spine, but that we're developing strategies right? For stabilization. So as I twist to the side, I'm not rib leading, right?
If I twist to the side, it's not shoulders but it's really trunk rotation. I'm not side shifting, right? That I'm working on developing strategies that will make that movement more optimal in terms of uh, the activation of the muscles that are required and that some muscles are going to be using more to keep things in place and others are going to be used more for actually producing the movement itself. This leads us to the last point that I want to make about core stability in this whole controversy of scooping versus bracing, right? And so, uh, there has been some recent criticism of [inaudible] because of our tendency to use a lot of the scooping type movement and what is scooping in terms of what we've been talking about today, what is it emphasizing using abdominals, right abdominals. And we're trying to get obliques and transverse working really hard there.
Right? And so what are some positives is that it's a way that we can help with activating those deeper abdominal muscles that we want to make sure that we activate. If you add the lower part in, it's been showed that pelvic tilting type movements can fire some of them though, uh, areas, motor units, and the lower part of the abdominal region a little bit more than our motions, like, like a roll up that's emphasizing that upper part, moving more. It also, if we're doing that scoop, we're good. We're bringing both ends closer together. And so that makes the abdominals work harder because muscle can't produce forces readily when it's in a shorter position. Right?
And when we're looking at higher risk exercises such as let's go from single leg stretch to double leg stretch, right? Or even more so to teaser, what are we worried about in terms of injury?
And so having a slight scoop in a posterior tilt rather than a neutral gives us a little bit more leeway if someone's not as skilled, right? To, uh, avoid that going into that position where they might hurt their back. So there are definitely some positives and I really emphasize that because my take on this is we need both. They're both really valuable, but I do support the idea that we don't want to just do that, that it's really important that we look at the concept of racing too. And so bracing is more the idea of coke and tracting, right? So that we have a more neutral position of the spine as we're doing a movement rather than that imprinting emphasis. And that scooping emphasis and the, a lot of the support for this is that idea that in functional movement there's going to be very few times that we're laying on the ground, right?
A lot of times we're going to be standing, lifting, leaning forward. And so we need to not just use abdominals, we're going to be using our back muscles at the same time as we're using our abdominals. And so we need to train to be able to, in a manner that's going to fit more with upright standing, upright movement that's more functional and that bracing can really help with this process. So I think that they're both really valuable skills and that one way to think about it is having some of your exercises work more with one approach and others work with another approach. And so let's try it just to kind of feel the difference. And let's do a single leg stretches because it's a safer way to do it.
And I want you to take your fingertips on your ass and purposely bring those ass back
And I want you to think about lifting with your low back as well as your low abs. And take this really slowly in and take it higher than you normally do. And just bring one leg out and see if you can feel that lift and same side. Bring that same leg in and now go a little bit lower and see if you can control it going a little bit lower. Yeah. And come in and then go a little bit lower. And if it's too low, stop.
So that it's a much easier exercise to do or lifting one leg up and lowering it down. Then what we just talked about. Well let's move into our last part here and talk for a little bit about
Chapter 6
Optimizing Pilates Exercise Safety and Effectiveness
optimizing both that safety and effectiveness side of supply. These exercises, we're going to go over some principles and then we'll take a little break and go into practicals in on the equipment and on the mat. Right? So if I could have Mary come up here. Yeah,
And so I just want to talk about a few, the principles that we've talked about and I'm going to have her start by just doing a curl up in terms of looking at spinal flection. So in terms of the curvatures that this mine, which way is this? Mine gonna be easy to flex. Thoracic. Yes. Thoracic. So first thing we're going to think about that neck, right? The Chin coming in and then right from here I'm going to have her in. You can just rest back here cause I'm take it slow mo for a minute.
For many people that are less strong than her, you're gonna think about that sternum sliding down, right? Trying to soften this area here and then bringing the rib cage closer to the pelvis, right. To really activate those abdominals. And I'm going to let go. And then from there she's going to curl back down sequentially.
And then that we transfer here that we're thinking about, just not wrecked us on the front, but those ribs on the side pulling towards the pelvis. So we get those obliques working as beautiful with the rectus on the front. Can you see that
So go ahead and lift your head and your shoulder blades off and we'll stop right there. What you'll see a lot of people do here now is switch. And now keep your back the same. And to sit up and use your hip flexors, it's hard for her to do, which is good. Yeah. Yeah. And then come back down. Right? So they'll do head five degrees of flection, the spine, and then hip flexors to get the rest of the way up. That's it. Keep this and really pull up here. [inaudible] so what's the difference?
What does it, how do you see the difference? Pelvis W W W was said one and another way I think about it. So with the curl up, you'd get a posterior tilt in the pelvis as you curl up. And another thing is that you're getting more flection of the lumbar spine and the spine in general rather than a little bit of flection and then it stays or becomes flat as you come to that sitting position. So try that once more and coming up up. Correct? Yes. Just to, to show that difference of the correct. And so you really want to see, and I'm going to have you put your hands right here just so we can do it slow and use your hands to pull up and bend those elbows. Right?
Can you see how much flux she's doing this without her arms normally, but just so she can hold it very different than now. Flattened back down, stopping here and then you don't need to do it, but then lifting with your hips that you see so many people do. Right? So that's a really key thing. Now as we add going into roll up here, right? What I want to point out with the roll up is that people that are really tight in their low back or really tight in their hip flexors, it's often difficult for them to get that reversal of Lumbar fluxion, right? Their back is like this and it goes to here rather than here or there.
And we'll come back to that with lower doses in a minute. But what we ideally see, go ahead and curl up. Just like any version that you would normally do here, is that this is the sticky point, right? For most people, is that Ashley had curls up. She's still getting that sequential flection and the lumbars line as she comes up and then stays at that position, right where she's inflection or does the version where she's coming further forward, whichever you choose, right? And then pulling back when we want to see on the way down, starting from pelvis and now here's the spot that so many people miss, right? That lumbar.
So we're trying to again, reverse that curve or get as close as we can to reverse in that curve as we come back down. Right? So that's the idea of that Lumbar flection that I wanted to point out. And I want her to also, this can be seen with the cat. So if you would just go to cat for just a minute on all fours that we so commonly see people and doing the cat where they primarily are doing thoracic flection. Right. Look familiar and come back down cause it's so much more mobile there.
And instead we want to what think about rounding into my hand here and really emphasizing that lumbar flection in this region. So we're going against that curve again. All right. So looking at that idea of again and come back down of how can we make this, these exercises more effective in terms of our long term goals of spinal skills and strength that we're trying to develop. So maximizing lumbar flection, minimizing basically thoracic. Alright. And then I want to use pelvic curl as an example of the other end moving.
So one of the things we talk about in terms of skill development is that it's very different to do a curl up where the top end is the moving in versus a pelvic tilt, a pelvic curl, or a roll over right where a short spline, long spine, all of those types of skills where we're pulling the pelvis app, right? So it's the lower attachment of the abdominals. That's the moving and bringing the pelvis up. And so in this movement, again, what we're going for is that idea of that sequential and what a lot of people do right about here is then switched to low back. I'm gonna have you do that incorrectly. Yes. And then come back down again and what do we want instead that we're keeping that sequential curl here correct now.
And then focusing on lifting with the bottom in the, let's stuffy right here, bottom part. Right. So this is that idea of the abdominals pulling up as those hamstrings are pulling down on the sitz bones to get that positioning where we're not achieving it by excessive lumbar extension. Right. But where we have abdominals primarily working hip extensors, primarily working, and then a small amount of back extensors accompanying that. Does that make sense? Good. And come back down again slowly into that position.
And then the next thing that I wanted to mention was that idea of weight bearing in terms of in terms of flection risks and benefits and effectiveness idea. And so as we do, you don't have to do that because you're not warm the whole thing. But if bring your legs up as if you're going to do a rollover, right as she goes over, if she were to bring her legs overhead, are you comfortable? Yeah. Okay. Right. F We keep them the legs in this position. Where is the weight primarily being born? Shoulders, right? Yes. You're getting a little bit on the neck and come back down again.
And she's got nice hamstring flexibility. Right? So I'm just going to passively just relax for a minute. Let me bring your legs a little closer to you.
So I'm going to pretend like her hamstring flexibility is here and I'll just kind of help pull that distance and now do it. And you feel how different it is.
They're here, right? That's where she's going to be and she's going to fall backwards because if she's not too far up right because of where the weight is. And so that's another modification that is I think really helpful to think about for people that are either really tight in their low back so they can't get that additional flection or where their hamstrings are really tight and they are here, right with those legs. And then if she were to proceed from there and bring her legs further over, where does it start making more of the pressure be on the neck. Yes. [inaudible] the stop there for right now, but if she were to continue to go where and touch the ground, right then there's a concern for the amount of pressure that it puts on the neck and again very much influenced by your hamstring flexibility as far as what that angle is going to be and your low back flexibility and this is in that gray territory of, and you can come back out of it slowly. That gray territory of depends on who it is, right and what their bone density status is and what their, you know, either low back injury history is and what their neck history is.
So there's lots of things. There's not an easy answer, but I just want to point out that this is considered a high risk exercise in term as you go further over in terms of the amount of stress it puts on the neck and that there are some really easy things that we can do in terms of the stopping earlier and using hand support. So if you're in a situation where there's a lot of people in the class that are different levels, right, that we can provide some alternatives that are going to put less stress on that neck. And then the long thing, the next thing I wanted to say about the [inaudible] when we look at fluction exercises as the long lever arm idea that we brought, you talked about with teaser and double leg stretch in those types of exercises. And I did want to just start by having her show this test and then I'm going to have you all try it. So you're going to lift your legs up towards the ceiling. So they're just 90 degrees, right? And so one of the things I think is useful in terms of thinking about where should my legs be when I am working on these types of exercises is to lower your legs and you're gonna stop before you start getting any indication of that pelvis starting to tilt forward. And then she's strong. She can go much lower. Well, I'm going to just pretend right that it was here and just move this hand to the side.
So what you would see for people that are less strong is that what would happen? That we'd start getting that anterior tilt and that arch right, that they are unable to stabilize so that what does this tell me? This is where the legs should be with hundred this is where the legs should be with double legs, judge, this is where the legs should be. It's a little different when the feet are on the straps because they help support the weight of the legs. But it's a lot of people, what I find is they follow the teacher or they follow the person next to them and they put their legs on a medically low.
And it's really important that it be individualized for your, your own body. Right. That so the close to the legs are too vertical. Right? So we're thinking about whatever that weight of the legs is. The further we move away from the axis, right, the more effect they have in the more torque that they, they generate. But what about someone with tight hamstrings? What do they have to do? Yeah, add that little bend on top of it.
It really is an important skill to learn. Not only how to stabilize, but to learn what is the level that I should be working so that it's going to be safe from my back. Right. And do you think it's just strength related? No, I got saw some good yet a good nose there is that it's skill related to it. And I, I'm sure a lot of you had those experiences with certain plots, these exercises where all of a sudden from one day the next the light goes on and you go, oh, that's how right there you find a strategy that's more effective for whatever it is. And I find that a lot with this leg lowering idea is that yes, it's strength related, but it's also finding just how to activate their back muscles and abdominal muscles in the hip muscles together so that you can stabilize and eh, in movement, if we look at spinal extension, I want one of first a look at that idea of articulation, right? So we're gonna roll, have you roll over and lay in, let's just have you use your hands there to push up to, to be as an assistant. Most people as they are, it's going to be all here, right? And come back down. And she has very small range as you can see. Yes.
Beautiful range of motion and uh, and so, but I want her now she's gonna hold back for just a minute. And I want you to try to feel, I'm going to have you actually go into a little bit of cervical extension and now see if you can find this area right here between your shoulder blades. That's it. Now think about pulling this spinus process towards the one below it. Yes. And this spinus process to the one below it. That's it. Now, right here, you're not going to let this part come off the mat, but you're going to arch above it. Above it. That's it. And pull this one down. Good. And this one down, do you see that up?
So that's the thoracic extension that I'm looking for. And now we're going to just add a little bit more in that middle back. And now as she goes into that low back to give a little bit more support to that lumbar spine, she's going to allow those ass to lift. And let's stop you right there so that the feeling is more that you're arching from the pubic symphysis, right? Rather than from the lumbar spine.
So you're lifting here and getting this nice thoracic extension. And I'm going to bring you back to the neutral position you had before. Yes. And feel this lift right here. That's it. That's it. Good. Do you see that difference? And now sequentially come back down and this part's easy, but see if you can bring one vertebra at a time as you can come down.
No. Right. And that can [inaudible]. So in order to arch, this has to go away. That rib has to go away. But I think what a lot of people are getting at is good. Trying to get away from this right where the ribs go forward and the pelvis anteriorly tilt. And so an another way of talking about that that I think is helpful anatomically is that you're thinking about what the lower of the abdominals onto the pelvis lifting up to keep those ass lifted as you're allowing the upper attachment to get further away. So it's almost two opposite things happening, right? Right here we're lifting and here we're lengthening as we allow that and it's, it's sophisticated coordination, so not surprising that it's challenging for people to find it to feel on your own body, right? And come back down.
So second concept then really important is that idea of protecting your lumbar spine with the bumble co contraction. And then I w I wanted to use the example of a rocking, and again, you're not warm, so just do a really small range, right, of reaching back at a, just this position. If you were to go into the, the full position, it look at the amount of hyperextension, right? And this is the hyperextension where we're lifting the thighs at the same time as we're lifting the lumbar spine, which really makes the a lot of tendency for sheer and this low back area and rest for just a second right? Occur. So those extreme hyper extensions, Swan dive rocking are considered high risk exercises.
And again, what does that mean? You should ever do them? No, it means appropriate whose it should be doing it and to what extent, right? And some of the preps can give you wonderful strength benefits without giving you as much, uh, stress in your low back. And also you can do some of these exercises with much smaller range of motion even if you have larger range, right? And still get really important strength, benefits and skill benefits in terms of, of maintaining that spinal extension as you're moving through space. Right? Which is a really unique and difficult stabilization skills for a lot of people to, to find the tendency as you go forward is what to want to straighten out the back. And then as you go back to one arch and then to go forward and it's very different to keep that just like down stretch on the reformer, right? To keep that arch the whole time.
So we're going to just take one example in the prep again and let's keep it pretty small. But uh, trying to work with this idea of a little bit more thoracic. So she's gonna take her feet and we'll do this together in the mat in a few minutes. Take her feet and emphasize extending the knees to pull her thoracic spine up. Right? So the, those legs are still staying on the ground right from there. Now think about really lifting right here, finding that thoracic extension.
Good. And now here
And one more time it's going to come up. And really think of the feet pulling away more so that you really get that thoracic higher here, higher here, pulling up and through. That's it. And that's it. And now from here, reaching the knees out long. So you're just thinking about hip flexor flexibility here that you're lifting your knees as much as the hip flexors will allow. That's it. Nice. And then come back down from there.
Someone have adequate strength in their hip extensors or are they trying to do it from their back? Often their back. Right. And what flexibility do they have and their hip flexors. So if someone has, let's just say she has 10 degrees of hip, hyper extension, she can lift her leg, she's got more, right. She can lift your leg this much without anteriorly tilting. Someone that has two degrees as soon as they lift, can you arch carefully? As soon as they lift that leg, no matter how much they try, they're going to interiorly tilt.
So it's really important to again know your own body and realize how much you're trying to maximize the extension at the hip. Minimize the anterior tilt of the pelvis, right? And then maximize that thoracic extension. So let's do this with a double leg idea. So taking your hands back and let's do that. Yes, that version here, and let's just bring the legs in once and bend.
And now as you go out, I want you to think you're going to keep them really low for a minute and you're just going to keep the thoracic extension just a little yes, that's fine that you're going to really think of those hip extensors lifting here. That's it. Good. And trying to fill this stretch across here while you're still using those abdominals to lift up [inaudible]. That's it. And come back down. Do see what I'm getting at and now carefully do it wrong or less correctly and less optimally. As so as she lifts those legs, she's getting that anterior tilt, right? And that arch right there, yes. And come back down and now let's go from medium range, right? So the, you get that nice length that you have.
And as she stretches, she's emphasizing thoracic. That's it. And going up. That's it. Nice. And coming back down again. Thank you. And again, so for each of us in this room, the degree that you could safely go, she's got the strength to be able to use a really nice high range of motion and support it. Some of you don't have the range, some you don't have the strength to support it. Some of you know, so each of us has a different level that would be optimal for us right now that over time could change so that we can go higher. So the main thing I would kind of summarize in terms of the spinal extension issue is that I think it's really important to not copy a picture in the book or again, copy someone that has a really beautiful range of motion and the strength to support it, but to key into your own body, right? And try to again, maximize that thoracic extension, use those hip extensors to lift the leg and get full hip, hyper extension, and then allow the amount of lumbar extension that's pain free, right?
And the feeling where you're lifting up and out rather than feeling an excessive anterior tilt and sliding forward in that low back region. Thank you. That's great. Next one that I want to mention is spinal lateral flection. And we can just do this together and it just as you're sitting, and we'll again in the practical, we'll come back to this, but this one is what I wanted to get at is when you go into lateral flection, what muscles produce lateral flection, abdominals back extensors, and Quadratus Lumborum, right? So we're really looking at a balance of those depending on, on the particular exercise.
So let's put one hand down as to where you're sitting to the side and bring the other hand overhead. We're doing gravity assisted, making it easier, but I want you to try to feel that difference between where you stick your ribs out, which is what you'll see a lot of people carefully and go down and keep that as you come back up. And where do you mostly feel it and your back extensors, right? And so many people are firing too much of their back sensors with lateral flection and they're getting that excessive arch in their low back. Now think about a little pulling up with low abs and I want you to emphasize it so that you're going to slight flection. Let's do the banana, right? So that you're in a slight scoop and you go forward from that position and now come up. And where do you feel it mostly bleaks? Yes, so mostly in the bleaks and now let's try to find a neutral position. So you're going to lift with your low abs, you're going to live with your low back and think about going directly side as you go. Over and coming directly up, bringing the rib cage towards your pelvis as you come up and hopefully you felt more everything working.
Right and so that's really what I want to emphasize with lateral flection is that if someone is going into their back as they're doing it or you're feeling back discomfort as you're doing that exercise, then it's a very valuable tool to go into exaggerated flection to get those obliques firing and to break that habit. But then as I start getting stronger, include some exercises that are going for pure lateral flection similar to the bracing scooping idea. Right then in real life we often want to have pure flection lateral flection where we're using front and back muscles and be able to coordinate that as well as uh, positions where we're purposely biasing it right towards obliques. And I think you'll feel that it makes it a little more challenging to make that shift and that relationship. The arms is is true for all of the exercises that we've looked at, the flection extension, lateral flection, but just the idea that we talk about the legs because there in terms of risk, there are really the issue because of their weight.
But arms can be a very valuable tool for making it more effective in terms of progressing right, making it more difficult. So with all of, if we think about lateral flection, if our arms are here are the easier than where yes. Behind your head easier than up overhead. And we often use those three choices as we build with strength. And the same thing with the spine easier here, harder here, artist's there, right? Whether it be forward or back directions.
So that is a really helpful thing to keep in mind. And then spinal rotation that we can, the trick about adding spinal rotation is that if we're just sitting and we're doing spine twist, it can be really valuable for building the skills that we're talking about. But it doesn't provide, it's not very effective in terms of strengthening, right? Because the relationship to gravity and we're not going against gravity as we do it. So in the gym that often use what a weight machine to provide that resistance.
But here in plots what we often do is combine that rotation with either flection exercises or extension exercises and that's a really effective way of doing that. And so if you're thinking about a example, if you wanted to bias it towards abdominals, right? Chris Cross would be an example. Hamstring pulse series, right? And when you start adding rotation to that, there's lots of examples that we use with back extension. It's swimming would be an example, right? Where we're adding or single arm swan on the chair would be an example that where we can add that and we'll be trying some of those.
But I think it's much more commonly done with abdominals and we need to really emphasize and make sure that we include it in our backyard sensor exercises too. And that it's helpful when we think about rotation to focus on using those deeper muscles too. So that feeling, whether it be with flection, that we're feeling both right and left side or with extension exercises that we're feeling both sides working as we talked about earlier. And when we're sitting. Another sort of challenge at when is when we're sitting trying to apply what we've talked about and we a little bit earlier, tried this idea of lifting and I just wanted to point out that when you sit, it naturally creates flection of the lumbar spine and uh, and we can exaggerate that by slumping more in, but it naturally decreases the curvature. And so what's been shown is if you use the abdominals or a lumbar support, we can markedly reduce the stress in the lumbar spine.
And so it's really helpful for us to work on that with our sitting type exercises. So since we were just talking about spine twists, let's take that as an example. And from here, start with your knees bent cause I want to take the hamstrings out of it with your arms out to the side. Let's do that. A fitting spine twist. Sorry. And from here, rotate to this side. And as you rotate, I want you to think about lifting with your low back as well as your abdominals and come back to center and now rotate to the other side and really try to feel both sitz bones on stay here and bring the midline towards the left right and the right side of the rib cage towards the midline to get that little extra rotation left with those low back and the abdominals and come back to center and you fully feel much more activity in the back. As we add that additional element and the where the Hampshire has come in is when you start adding the hamstrings. If someone is tight in their hamstrings, they can be lifting with their low back all they want and they can't get to a proper position. So what do we need to do? Yeah, bend the knees and put, yeah, elevate the pelvis with the a roll or something underneath to help them to get their weight forward relative to positioning to be effective. So we are going to be as we go through the practical, right, applying,
Chapter 7
Spinal Movement Analysis
trying to apply these principles to specific movements and before we do that, I want to just review a few of the principles that underlie movement analysis. So type of muscle contraction, we're going to be using a curl up on the next slide. If I'm doing a curl up, right? If I'm doing a curl up, we can divide it into up phase and down phase and up phase is going to be con centric, right? So constant or contraction, we talk about as a shortening contraction, this case, the abdominals where the distance gets closer as would curl up and on the down phase, east centric, right?
So it's the same muscle group working but controlling that lowering. If we used our back muscles, what would we do? Crash and burn, right? We go into the floor, it's, but we need those same muscles to help control. Gravity is going to make you fall and so we need those same muscles to work to help control that lowering back down. So content-rich on the updates east centric on the down phase.
If I held it in place, then that would be the isometric contraction and if we think about that movement, it's really important to realize it's named for direction rather than position. So you told me that I'm that this right, I'm using my abdominals East centric. Lee going from here to here as what? Spinal extension? Yes. Because you think even though I'm curved, it's not positioned even I'm still curved here.
If you look at the difference between here and here, can you see that I'm going towards extension, I'm going in the direction of extension and so that it can be confusing sometimes, but it's important. Prime movers are going to be wet. The muscles that are most important for producing the movement. In this case, what would that be? Rectus abdominis. What else? External obliques and internal Blakes on each side are working. Synergist would be something that neutralizes an undesired motion of the prime mover. So let's take external oblique. External Oblique produces rotation or to the opposite side.
I don't want rotation to the opposite side. What could I use as a synergist? I could use internal a week on the same side or external week on the opposite, right? So some [inaudible] but we're doing that. But the reason that it's important to bring up that point is you'll see some people that when they rotate a are seeds and when they curl up, they're rotating slightly, right? Because they're, they're not using a synergist adequately to get that pure flection that we want. And the stabilizer would be what? Something that holds something in place. And so in this case would get, think about the pelvis, the various muscle that we're using it at the pelvis.
Um, to keep it from going into flection. Let's too much flection, let's say using our extensors so that we're getting more flection of, of the spine and less fluxion of the hip in earlier phases. Later, we would have to add that. So you just told me these answers, right? But so up days is spinal flection, right? Content-Rich contraction.
The functional muscle group is spinal flexors and the specific primary ones are rectus external bleak and internal bleak down phase. The movement is spinal extension, but the functional muscle group is not spinal extensors but spinal flexors working east centric Lee, same muscle group. So we'll be looking at at that as we go to the mat. So let's take a little break and get set up for the mat. Thank you. Thank you.
So now we're going to look at some spinal alignment problems, right? And then
Chapter 8
Spinal Alignment Practical on the Mat
So take your time and bring this rib down a little bit, but up and four, that's it. You feel that difference? [inaudible] yes. And so if we think about this idea of what muscles that we're using when we talk about for Lumbar Lordosis, dominoes abdominals, right, that we, those abdominals are working two ways for her. One is to help lift the lower attachment, right? To bring that pelvis to a more neutral position. And the second, and the hard one for many people is to feel that attachment on the ribs, on the sides, bringing the rib cage slightly down and forward, but then still keeping the thoracic extension and lifting behind the ears. That's it. Do you feel that and let it go to where you normally are just to feel the difference.
[inaudible] yes. And so we're just going to do a couple exercises and we'll, I'd like to have you join in, right? Couple of exercises for working with this. And we're gonna start with a basic curl up. So laying on your back, your knees bent, everyone. And so one of the issues you're going to start with laying back down with Lumbar Lordosis is that it's very difficult to get that flection and the lumbar spine, right? So you're gonna curl forward, bringing your shoulders off. And then take your hands on the sides of your thighs, everyone. And from here, bend your elbows a little bit and use your arms to pull yourself up higher. And try to feel that curve right there. You feel it and pulling.
So you're scooping around my arm as you pull up, that's it. Nice. And hold that position and let go with your hands and see if you can hold two, three, four and then come back down again. And again, curling up and from here, arms on the side and curling up higher. And this is the spot. Instead of going right to hip flexors, you're getting more flection about Lum bats. It that lumbar spine. Nice. It's almost cramping. And from here you're going to let go.
Hold it, hold it, hold it, hold it and come back down. Good. And so one of the principles that I'm trying to use here is that you're stronger with an isometric contraction than a con centric contraction. Everyone is and still strongly with an East centric. So, even though you can't quite get there with the cons centric, you can use your hands to pull up and then let go and hold so that your start building strength in that region, that will help you to get movement in that lumbar spine. Right? So let's all try it together again and curling up and taking the hands and pulling higher and really getting that fluction that's at good.
And now from here, letting go and we would progress it. What are would make it harder with the arms. Yes. Arms starting to go overhead without dropping down. That's it. Bring him forward and come back down. Right. And so I'd want to see a kind of think of this as a pre plenty's right?
A Pre roll up exercise that I'd wanna see that you could start having the strength to get flection in that area and mobility to get flection in that area before I'd have your legs straight and go into the the next exercise. But we've, the other way to work with this is starting from sitting up, right? So take your hands and pull yourself up to a sitting position. And so this is the, the idea that we can again generate the most force with an East centric contraction. So what I liked with lumbar lower doses is to think about if you can only go here with cons centric, we'll work above it, right, with an East centric until we can meet at the pool place where you have a full arc of motion that you can do.
So now you're going to curl back here and start with your arms forward. And as you curl back, you're gonna think about pulling those low abs in. Yes. And now right into my hand, think about pressing your lumbar spine into my hand. That's it. Hold there, hold there, pull those low abs and even more. That's it. Can you hold that and then add those arms going overhead and coming back.
And yes, we can just go forward and then come back up to sitting. And one more time curling back, starting low. Really trying to emphasize that Lumbar flection as you go down. And then from here, curling lower, lower, lower, lower, lower, lower, lower. That's it. And I don't know if you're strong enough, but if you are taking those arms just a little bit overhead, yes, that's okay.
And now just once is fine and then forward and then curl back up, right? Cause I want to feel that. So it's easier to feel that flection starting from sitting and going back. And that's what I'm trying to use. Now let's go to our roll up, but with the knee slightly bent, right? So now you're going to start on the floor.
You can start curling back if you want, but start on the floor with your arms overhead and just try it with the legs straight once and bring your arms forward. And this is the spot. Go ahead and curl. This is the spot that's so hard for people with Lordosis, right to curve around that. Do you feel it as you come forward and as you come back to get, not here, but to try to feel the flection, lower sacrum coming down. Sacrum coming down. Yas Good. So bend those knees [inaudible] right here. Bring this down. Bring that down, that set as you lower. And so, uh, let's go with those knees bent a little bit further right there. And so arms and right from here. Now you're going to curl up.
Yes. Good. And this is the spot. Less thoracic and more lumbar. Pull this in and wrap around. Wrap around, wrap around. Better, better, good. Getting some motion there. And now as you go back, less thoracic, think about you're going back and this is going to stay there and this is going to go down. It's going to go back lower, lower, lower, lower. That's it. That's it. Much better. Good. And come back down. Difference. Good, good. So basically that focus right in, in what we're trying to feel with Lumbar Lordosis is to both get strength and mobility in that Lumbar area so that we can start getting both motion and a change in that curvature. Dynamic change in that curvature. So that's an example for strength. How could we make it harder from there?
And now let's go together through some stretches. So if we want to stretch low back, I want to stretch the low back and let's have you curl up and do the classic spine stretch forward. Right? And so I'm going to have you changed so that your feet are that way so that everyone can see or most everyone that you can see from the side here. Yes, it can see from the side, right? And so can we see if she's sitting here that, that she is in that foot Lee lordotic position? Yes, that comfy position. And Go ahead and just do it once.
So we have a reference point of going forward
Now here's that spot I want you to think about. Yes, that sternum softening. Like you're hugging someone and you're rolling down close, close, close. You're going to put it, I'm going to take, take you to the classic for a minute and just put your hands flat on the for you right now. And now as you go forward, I want you to think about that. I am holding this back. Okay. So as you go forward, I want this to lengthen, not your thoracic. Yes, yes, yes. There you go. That's it. So that constant sustained down. You're reaching with those hands. Slide them on the floor. That's it. Better, better. Keep going if you can. That's it.
And now as you come back up, uh, not from here, but he not from there. Yeah. From right down here. Low, low, low, low. Not sit here. It's really hard. Bring it. Bring it here. Try to feel this length in and come down better. And then stacking vertically. Just a vertical, not the rib going forward. Up. Yes. Fill that. [inaudible] and one more time. Rolling. Yes. And that's that thing about strategies, breaking strategies, right?
That we're so used to it when we have different postural that feels right and automatic. So here you're going to roll down [inaudible] and just use your hands just cause it gives you a little bit of support there. And now feel like you're pulling back away from your hands first with your low abs to try to get some motion here. Yes. And now allow your weight to drop forward. And think of cost 16 down. It's got a big weight on it, right? And then your lumbar spine is lengthening over that. Yes, it's better.
Better. That's it. Reaching forward, reaching forward, reaching forward, better, better. And now take your time. As you come back up, it's gonna start lower, lower. Think of posteriorly tilting and bring your sits bones down. The Asi s back sits bones down. And now from here, stacking, stacking, stacking, dop. This going forward felt this going forward. Yes.
A little bit more low aps. That's it. Do you feel that? Yes, I do. No, go to where you normally are. And yes, and so this is, we were talking about that idea of strategy her, she's used to stabilizing using these back muscles. So it feels really foreign, right? It's almost have to relax them. Exactly. That, that it's, it helps if you can feel that relaxing, that and then substituting, right. It's percentages. Not all are one, but more abdominals, less back in terms of changing that ratio. So it really has a different feel. Yes. Good. Thank you. And, and so actually our last thing we're gonna do is hip flexor stretch.
We can all do this together and let's do a right leg forward facing this way. So yes, and you guys can face in and we'll go here. And so what I want you to feel as you go into the stretch though, with your knee over here, just go into the way you normally would and let's, let's do the version with your hands on your thigh. And so automatically when people have lumbar Lordosis, the tendencies to anteriorly tilt here. And so even though it looks like a hip flexor stretch, you're slackening the hip flexor, right? So right from here, I want you all to focus on bringing the ass.
You're going to keep your knee right where it is, but just your ass is going to come back. Like you're tucking, not here, but you know, lower down bringing, that's it. Bringing it back, bringing it back more. Do you feel that? And now that that's back and it's back on this side, you're gonna press the bottom rather than the top of the pelvis forward to get the stretch on this side to keep this lifted. Yes. Do you feel a stretch? Good. Good. And now let it go to feel the difference. Let it in. That's it. And that's where you're good. And now, right here, lifting and now pressing the bottom and pelvis forward. Nice.
And now try not go so far back with your upper back. You're going to still keep that over. Nice. And now find that thoracic extension. And if you're okay with it, lift your left arm off, lifting overhead. And I want you to think of it to attach to this Asi s and as you lift that arm up and back, you're pulling this ass up towards the ceiling and reached the arm behind you. Keep pulling it up towards the ceiling. That's it. That's it. Good, good, good.
And then come back and rest. Good. You're welcome. Welcome. So those are some ideas for Lordosis. And so if you stand finished by standing for just a minute, we talked about what strengthen AME abdominals. And when we strengthen those abdominals, there's that need to emphasize and both pulling up the lower attachment to find that neutral pelvis and pulling the, in her case the rib cage slightly down and back while you still keep this thoracic extension. That is the hard part. So that your over your torso is over your pelvis, right?
And then stretching the low back. And in many cases it's the challenge is to find how to stretch that low back rather than just stretching the upper back, right? Thoracic spine, more and hip flexors. And the last but not least is the Q idea. Right? And so what can you think of to help you to embody, right? What we've been talking about. So I'm going to take you a little bit of an angle like this, right?
And so move this foot so that you're facing on that diagonal, right? And from here, what do you want to think of here? Yes. Lifting those low ams and now the trick and you can see very nice. Exactly shifting the weight. So it's in front of the ankles.
And then the hard part is finding this a little bit more drop here while you're thinking of lifting the upper back up and forward and lifting behind the ears. Yes. Good, good. So for her, it's not only lifting that lower attachment and trying to feel this lengthen, but also feeling the ribs coming down that the distance is shorter on the front, right. From both sides from the lower and that per sign. Good. Thank you. Thank you. So next we're going to look at Kyphosis, right? And so what is kyphosis?
Exaggerated Thoracic curve, right? Exaggerated thoracic curves. So she's gonna and to demonstrate this for me and just pretend like it's been a really hard day and she's tired and she's sinking into that upper back. Right? And so what we want to think about in terms of correction is strengthening what back extensors, the upper back extensors, right? And then, um, stretching in some cases, abdominals in front of their shoulder, right? But really the key thing, most important sort of universal thing is strengthening this upper back part.
So we're going to start, I'm sitting and I'm going to have you if you would throw that blue. Yes, thank you. That's good. Or either way. And I'll take the band in your hands, right. And so from here, elbows are by your side and you're going to externally rotate and come back. And so this is just getting at the idea of the rotator cuff, right? That counters the rolled shoulders externally rotating and come back in again.
And now you're going to extremely rotate and add thoracic extension. And as you lift up, think about that upper back, lifting up and back and come forward. And again as externally rotate upper back lifts. And now we're going to add arms extending up and back. So actually more like down and back.
Elbows in and forward. Keep going. And again, externally rotating. And now from here, when that upper back arches, you're trying to feel the left right under the shoulder blades with the sternum lifting up to the ceiling. Yes. And Lean back right here into my hand. That's it. Beautiful. And now extend you could to hit me and bring the elbows back in and come forward. And once again, lifting after, do you externally rotate? And so the tendency is to want to shift forward here. You're going to still keep those lower abdominals lifted and you're going to think of going back further. Your sternum is sliding back, your upper back is leaning into my hand. That's it. Good. Nice. Right here. Right here.
Good as you extend nice and elbows in and come on before. Do you feel that difference? So it's higher, right? Yes. Good. A lot of work right in between the shoulder blades and the, and it's, it's, so it's for most people it's shifting it from about here to there that I'm going for that. It's, it's easier to find it down here, but it's, this is the area right here that will help open that curve, right? Yes. Good. So that that's just a non plotting exercise but applies this exercise to work on countering that rolled shoulders and finding that upper back and then we can try to apply that right with other exercises. But before we do that one that's common that I think is also really helpful both for strength and stretch is to use the ball or the spine corrector.
Right? So you're going to jump, I'll have her do it first and then I'll come to you. And so go ahead and go foot forward right there. And you're going to have your back to this ball. And from here for the stretch part, you're going to just bring your arms overhead and lean back into the ball. Yes.
And so we're trying to feel the stretch across the front of the shoulder as you allow your back to rest on that ball. Yes. Good. And really let this drop. That's it. And as you exhale, let it drop closer to the ball. That's it. Good. And now come back up just to vertical. And now we're going to add the strength part with a stretch.
So you're going to reach up and go over that ball. And now while those arms are there, you're going to think about pressing your upper back into the ball and find those same muscles right between the shoulder blades and push. And hold too. Two, three, four, five and then let it go and come up to vertical. Do you feel it? Yeah. Good, good. And again, up and over. Nice. Good. And then pressing into that ball into that. Yes. Good. And come back.
So we combine, right? That combination of upper back, extension strength and stretch on the front of their shoulder. And then I'm gonna use the same exercise. Another variation when have you do, and if you would bring that forward that, oh that if you, and I'm going to have you scoot to your bottom is at the edge here and then lean back. And so the trick here, she's going to pretend like she has kyphosis for us, right? Is to find that area so that it's going to give you a stretch where you need. So for common would be right about here, right? So you're going to scoot a little bit right there and now go over this arc.
That's it. And Burn your arms here. And so this is often done in plots, right as part of exercises dynamically to bring the arms in that overhead position. But you could also stay there for a stretch and put a little box under here or a bald support the head. But it's really nice because you can shift up and down just as needed. Right. To get the arch where you want it. And you can actively, again, in this position at pressing, think of it high, pressing your upper back into the arc.
Like you're going to go over it. Yes. That's it. Pressing down and you can see her sternum is going that way. And that's what I want to see. That the arch is increasing in that upper back area and hold for five and then relax. And you're gonna just come back just a little. Support your head.
And now one last time going up and over and reaching, reaching, reaching, reaching up and over. That's it. Nice. Good, good.
And hopefully you feel that that area has been very active. Yes. Good. So now let's take that concept into a classic plot is exercise. Let's do a prone, we'll we'll do, um, just prone back extension and then we'll make it into breaststroke, right? So lame with your head here on your tummy.
And first as you press up, before we go into two breaststroke, I want you to try to find that instead of it going just into your low back that you're feeling this upper back. So as you pressed with your hands, you're up right here and feeling this. Get closer and this get closer and less neck. [inaudible] and trying to feel this, get closer and this get closer. That's it. Had even a little bit lower. And now right here, lift didn't push with your hands and think of bringing your right here up. So nothing below it's going to move.
But you're walking your shoulders back towards your waist. Aha. Do you feel that? Good. And come back down. And same thing, starting from the top and just a little bit with the head and then right into the upper back. So remember that neck is very flexible in that direction. We don't want it to go very far. I'm going to keep that here, but now try to find some motion here. That's it. That's it.
And now walk those shoulders back. That's it. Now, right from there, hold that position, legs together. Hold that position. And can you slide your arms forward and go into breaststroke? Yes. And Bend and lower. We'll let you lower in between and coming up, keeping that head more in line, trying to feel more upper, more up or more upper. Use Your hands to help find that upper yes, yes. Stays down but more here or there. Yes. Good. A little more. You've got a little more and a hold that.
Keep this short and now re reach those arms out and around and and bend and lower. Good, good. So again, it's, you can feel that right now it's very easy as soon as we get to any of the full back extension to skip and go here and here. And so it's, it's really helpful in my experience to put some other things on the spine corrector on the ball to really help you find that area. Start getting that area stronger. But it's also again, learning how to be able to activate that and so that you can then put it into the sequence of any of the spinal extension exercises we use in placer. Okay, good, thank you. And in terms of just sitting, you can just do this city in terms of that correction then of the queuing. Would you come a little forward here? If you allow yourself to sink here and go back into that position and then from here, think about just a gentle lift up, up, up, up, up. Yeah.
Well that Chin stays in and the lift is behind the ears rather than in front. Feel that and now let it sink a little to feel the difference. And one last time, lifting up with yes, good behind the ears. That's nice. Without the, without the ribs thrusting forward. Right. So it's a very specific right here. Go ahead. Thank you ma'am. You're welcome.
Okay. And so we have cervical Lordosis, a flop that flat back, flat back, flat back. And so we're switching gears here now. Right? And so now we're thinking about, oh, I want arch in that low back rather than let's limit the arch in that and that low back. So we're looking at exercises that will kind of help with that concept. And so just theoretically she's pretending for me, my, um, that she has this condition. And so if someone was really flat here, we would want to strengthen, right, those back sensors to help create that, that curve, right? And we would also potentially want to strengthen the hip flexors.
And I'm going to start with the idea of the double leg kick. So starting with a double leg kick lane on your tummy. Sorry. And so first w to get ready for this, I want you to again press up and just arch your back. And so now you get to arch your low back, right? And come back down again. And I still want to emphasize though with this, even if someone has a flat back, that they're using their thoracic extensors too.
So she's gonna think about as she arches starting from the top and getting that upper back working. So lifting the head Nice. And then here, feeling the shortening occur. That's it. Now carry that down and feel the back sensors working here. Now carry it down and work here and then to here and, and go just a little bit higher. You're gonna keep your legs on the floor for right now just to feel that,
And then let's go ahead and take your arms around too behind your back and do double leg kick. But keeping your thighs on the floor. So I want to just emphasize the lumbar extension part first. And so from here you're gonna lift your head and your upper back and allow that full back arch and extend those arms reaching out. And as you reach out, you're going to lift up a little, keep those legs on the ground, lift up amendment with your hands. Sorry, that's not clear there. And then come back down. So do you feel how it's really by bias towards lumbar and low back and one more time. Yup.
And so feed her on the ground. Yes. Good, good, good it and come back down. So what is the risk here? Yeah. So we're going into is some people have discovered, so it's really important. This is hyperextension, which is a risk, you know, considered high risk in terms of low back injury. And so we need to make sure that she's working in a range that is pain-free. Is that feel okay? Okay. For your back. Okay. So the point that I wanted to make is now if we were to add the legs to it, what happens with those legs? When the legs lift up?
I'm going to just move your hands up a little higher. It just lift your legs. So there are a couple inches off the ground. And so if she can really use those hip extensors right as we talked about a minute ago, and just keep trying to keep that pelvis fairly neutral. And now just bend your knees once. Let's do that one version and now straighten them out and think of lifting just a little bit higher.
Can you feel how you're not putting extra stress on your Loba [inaudible] and one more time bend in this time as you extend, let your pelvis anteriorly tilt. Let it go carefully as you reach out and you can see that there's much more arch in this area here and come back in. And so I'm saying this for two reasons is that double leg kinds of lifts to the back can be used to help get more motion in that lumbar spine. But you have to really be careful because that is a mechanism of causing back injury. So it has to be done very carefully. So the way I would usually start with someone who's emphasizing [inaudible] head down and keeping a neutral pelvis as much as possible. And that's the way we're going to start here. So try it again. One leg, the legs coming in once and now as they reach out. Good.
Keeping these Asi es lifted, reaching the hands back and really trying to feel that you're allowing good reaching up. That's nice. And now lower back down and legs bend once and reaching out [inaudible] that's it. And come back down and now carefully can you lift your thighs off a quarter of an inch and still keep that neutral pelvis. But so you really make those hip extensors work. That's it. And now band and strain, keeping them lifted and pulling up. Yes.
And now as you come down and bend, keep them lifted. Don't let them come down but still keep these abdominals working. That's it. And come back. Yes. So it's, it's the opposite, right, of what we were just working with, with kyphosis where we're trying to emphasize carefully building in those Lumbar extensors. Uh, well not to forget the thoracic extensors, but that the emphasis is getting more range and more arch in that area. We could strengthen the hip flexors and for time, I'll just say that you want to be very careful in terms of that progression. Also to make sure that you're not hurting the back.
That let's just do one thing as an example and you're going to sit up and face that way and scoop pretty far back here and we'll have you go sit back so that your hands are supported like this and you're just going to do one leg, lifting one leg up and then bend that knee and then lift it higher and then extend and then come back down. All right. So I'm just doing this as like a pre to getting into teaser types of exercises where she's working with one leg at a time and so you're lifting that leg up. Now here's where it's different as you bend, right as it comes higher, I don't want to post your tilt like we normally would. Yes. Uh Huh. And so you're thinking of lifting with that low back and those low abdominals and you're just flexing at the hip as you extend. That's it. Feel that difference and then come back down and let's try it once on the other side, lifting that leg up and bend it and really try to get this hip flection without yes. Rib there and low back lifted. Yes.
Lifted higher, higher, higher, higher the leg. Yass good, good, good. And come back down. All right. And then from there we could slowly progress into other exercises. But this is a time where we'd want to be going more towards that bracing concept rather than the scooping concept where with lower doses we wanted what scoop? Right. Scoop. So it's a really, it could be even the same exercises, but a very different feel because of that. Okay, good.
Thank you. And so now last but not least, we have cervical lordosis that she's going to represent that I'm going to have you face a little bit of an angle here. If they seen on that diagonal and from here she's gonna pretend like this is her favorite and just let her chin go forward. Right? And so can you see what I talked about earlier? That this is actually flat or here and then it's increased there. So one of the exercises that I like to use for this is the neck press.
And so for here you're going to take one hand and place it at the back of your head and put it quite high. So even a little higher than that [inaudible].
So you get those neck flexors working. That's it. At the same time as this LinkedIn's do you feel that? And you should really feel the back of your neck length.
And as your linkedin up, press down into your front, hand under the chin, and also press the top of your head slightly back into your hand.
So turn it that way and take your opposite. So hand and place it under your thigh and really put it under your thigh so it helps keep your shoulder blade down. And now from here you're going to bring that head forward on a diagonal. For a stretch as that Chin stays in. So it's a forward do you feel that?
And you're going to press back into your hand just a little, just a small amount. It's a nice thing to do at work. If you're on the computer and your neck is starting to feel tight and then very gently chin in, you're not putting a lot of pressure and gently stretch. And now turn your head the other way. So it's on this diagonal. And so you can keep the same hands and really put this one under so you can anchor that Trapezius on this side and then feel that as you're going this way you're not letting this shoulder come up and hopefully can fill more stretch right here.
So think of moving that lift behind the ears and now keep those ribs in and shift your weight. I'm gonna let go and see if you can feel that. Do you feel it more length here? Yeah. Good, good. And so what are some ways, thank you that, that um, this would be done dynamically in classical plotters exercises that you would stretch your neck. Can you think of some more advanced work net pole with your hands, uh, and rollover, right where you then control balance if you're doing that, but any of those where you're rolling over, it's gonna give a dynamic stretch to the neck in that position. And in terms of strength in the neck flexors, pretty much everything that's a curl up, right? A curl up kind of movement or where you're holding.
And since we haven't done it before yet, let's do hamstring pull. As an example, if you would just go to having this leg being your top Lang and the other leg out and yes, the version with your hands there. So you're not supporting your neck. Right? So those neck flexors are having to work and then switch legs. And what I wanted to point out is the neck position. Right. And they abdominals. And so basically what we want to feel is that same idea that this chin is back slightly and this neck is lengthen. And then this, right when we get to this. Yes. Not the neck. Let the head that head stays back and work as here, pulling those ribs. Remember, not just on the front but on the sides to let the head go back a little bit.
And the chin, that's it. Well No, not quite that much. Yeah. Right there. Yes. And do you feel that difference? And now it's try to stay there as you switch. I'm going to help give you a little assist here. Aha. And switch. That's it. And one more time and switch and starting to come forward, right? Which is normal. Yes. And come back down.
But can everyone see that that difference in? So what I really find a lot of times with that, that Chin is that, um, we have to, again, in terms of strategy, instead of thinking of using our necks so much that we have to transfer to where we'd go past the neck, we feel that sternum come down and we
Well, we're going to apply some of these same principles that we've just been talking
Chapter 9
Spinal Practical on the Reformer and Closing Comments
about on reformer and so we're going to start with reverse knee stretch. And when we get into this position, in terms of thinking about the alignment concept, as you do this exercise, go ahead and and go. The tendency for most people is to again, get more motion in the thoracic spine than the lumbar spine. And if we think about what's going to be effective is that we need to shorten the distance between here and here and in order for the abdominals, be effectively shortening. So there's two things I want you to do. First is I want you to really focus on keeping these shoulders still and then bringing the pelvis under and thinking about lifting it up and forward as you go forward so that you're emphasizing, yes, good.
More lumbar flection. That's it. And the shoulders. This staying totally still and once more, I want to shift you a little bit further forward to start with and right here. Stop and think about lifting higher into my hand. Good. Now wrap your pelvis around my own and really activate these low abdominals here. As you pull those knees forward. I want to feel him shaking, shaking. That's it. Good, good, good. And then back and again, deeper. Lower. That's it. Coming up, up, up, up, up.
Good and back. Do you feel that? Good. Good, nice. And then if we wanted to progress this right, we could add rotation by doing diagonals. We'll just do one example of that. And let's have you take both hands on this side a little bit wider, spread apart and shifting your shoulders forward. So when you are in this position, it's going to intend to make you laterally flex.
And now I want you to think of that. It's one line from your head going to your pelvis. So I'm going to shorten this side a little bit, and that's it. So you're no longer, your shoulders are no longer over your wrists. So now same idea, but you're curling on a diagonal.
They want you to really try to fill these obliques on both sides. So curly and under, lifting up and using those obliques. Good. And you're going to take those hands and go all the way to your hands. Keep going, keep going, keep going, keep going. Keep going. That's it. And back. And one more time. Lifting under, under, under. Good.
And come back. Now you're gonna stay forward. Stay forward. Stay there. And from this position, you're going to slide your right leg back. So we're working on stabilization, stabilization, that's good for today, and bring it back in and come back and we can use a lighter spring for that to start with, right? So w the first principle is that we're trying to maximize lumbar flection, right? And less thoracic. Second principle is that really what makes us effective is shortening the distance between your pelvis and your shoulders, right?
That there's more spinal flection. So you're thinking of lifting the pelvis up and forward while those shoulders stay still. And then for progressing, we can think about adding diagonal to get more oblique involvement. And then we can add single leg sliding back with a lighter spring to begin with to work on that stabilization from this position. Good. Thank you so much. And so our next person is, we're going to switch from abdominals, right? Spinal flection, spinal extension, and go ahead and go into pulling straps.
Right? And from here, I want to work on that same concept that we were just focusing on of getting thoracic, right? As well as lumbar. And for here, let's deemphasize the legs at first and let them drop actually a little bit lower than horizontal. And as she pulls back, she's gonna think of this upper back working. Yes. Beautiful. And now middle and now low and reaching those arms right to your sides. Good. And then coming forward again and trying to feel it from here and then here and then there and then in line. And one more time reaching back.
Really trying to feel this upper, middle, low, lifting those asns off. Good. Good, good, nice, beautiful. And here, hold that position. And as you hold this position, think of reaching back with your arms. Find those lats and pull that thoracic spine up just a little higher. That's it. And come back down. And so now if we wanted to progress this and there wasn't any concern about low backs, we could add just horizontal, right? Keeping those legs at horizontal. So we're adding the hip extension component into it.
But I want you to really think of that concept of Asi just slightly lifted and arching from your pubic symphysis rather than letting these drop. That's it. Beautiful Long head
And so what I want you to do is as you're pulling up, continue pulling and think about shifting into my hand. So to the left, to the left, that's it. Now you're actually in the center and then come back down. So it really takes an active sense of shifting the ribs towards the direction you're rotating. So same side as that left arm comes down, you're shifting. Good, good, nice. So that you're staying in that center and lower down. And now let's add to it the idea of both sides of your back working. So we're going to just do a brief hold in that top position, you're pulling down, thinking of the right shoulder, staying where it is, the left going higher, you're going against gravity, shifting to the left. Good.
And now from here, pull the center of the spine to the right. Yes. And this side, there you go. And let that bottom arm more towards your side if you can. That's it. Reaching it back. Nice. And then come back down. And do you feel that greater intensity as you do that? Good.
And just for little bit of balance, let's go to there, her right side once and really focus on first just feeling that rib shift to the right as you lift up. Good, good. And even more to the right. Even more that center. Nice. And come back down. And now focusing on the left shoulder, staying where it is and the right side going higher as you rib ship to the right. So you're really going against gravity. Nice. Good and lower down. And the very last one is trying to feel both sides of those spinal muscles working. So reaching back, right side is coming up and you're rotating here to there and spine as processed to here. Beautiful and come forward.
And that was three months of work, right? That progression, meaning that I would normally work on getting that thoracic extension first, right? And then just adding a small rotation for maybe four to six weeks and then adding greater range and feeling both sides of the back work. So you did accelerated program, thank you. And then if you would stay. Yes. And let's look at lateral flection. So we've looked at flection so far, an example with flection and example with extension of the spine.
And now let's look at lateral flection. And this is what I was talking about earlier in the lecture of how we can buy us. This does mean a lot of springs on there where we can buy us as uh, as needed. And yes, put your hand down there for support for right now. So I want you to just, and the arm position easier is here, right? Harder is here and hardest as arm overhead. So let's start with this easier position. And just talked about trajectory, right?
So the most common thing that we see with this is ribs going forward as you go down. So I want you to think about keeping the ribs back and those low abdominals working so that we're avoiding that excessive arch of the low back. And now from here, add your arm and go down. And so this is like the banana shape we were talking about, right? Where you're really biased in it towards the obliques. Do you feel that?
And so we were scooping rather than bracing, right? In terms of that concept. And we're biased towards the obliques. Now she's been doing this for eight weeks and so I'm feel like she has the skill to be able to go to more neutral. So here I'm going to take you from this position and put your hand down again and bring your self back. You're gonna take your hands behind your head and add the other one to it.
And I'm just gonna use this so I can guide you a little bit. And now from here, those ribs are going to come back just a little bit more. You're going to be right up on this hip and you are trying to go like you're sliding down a wall, pure lateral flection. It's going to be further back than you're used to thinking. And now as you come up, armpit is going towards the ilium. That's that. And now coming back down, reaching long, long up and over, directly side. Beautiful. And then coming up, that's it. And I'm gonna let go.
You okay to do one and going down right and coming up. And now we're gonna add arms overhead, right? And so I'm going to actually start you with your arms in there. Like they were behind your head. Sorry. So go ahead and put your hands behind your head. No, you were mind reading me, right? So we're gonna go down just a little, and now from here, bring those arms overhead. You're in that fun part down there so that now you can lift up and feel that good.
Bring your arms back behind your head and you're going down feeling that direct side and reach those arms out and lift up. And now six weeks later she's going to add rotation, bringing the hands in behind your head and going down and reaching those arms out. And from here she's going to rotate as she comes up and then come to square and bring the hands behind your head and going down and reaching those arms out and rotating and coming up and bringing the hands in behind your head. Very nice. Thank you. Thank you. And so you can see, right, a really dramatic difference. Did you feel that difference between going from that scoop position to neutral and then increasing the lever arm and adding rotation that that can take weeks or months? Right to do ever first of [inaudible]. Great. Good.
And if I could have my next person come up.
Now while those low abs are working, oh so nicely, we're going to add the thoracic extension here and think of lifting behind the hat ears, right? Yes. Good. And can you give me a little more thoracic extension? There you go. And now from here you're going to press back
Keeping those low abs with the hips down [inaudible] ribs a little bit. And right here before you go pelvis down, just a little more low amps. Yes. And now pressing back. That's it. Now here, go forward keeping this, keeping this, keeping this lower ribbon, lower it. That's that. Do you feel that difference? And last time going back
Good. And Go ahead and bend your knees and come down and we would progress later, right to working on scapular stabilization with that. But really the, the most challenging thing is putting together all that we've been working on of cocaine tracting abdominals in the region that wants to arch, right? Adding the back extensors and in the region that wants to round up so that we can get that bracing effect all the way up the spine and have a neutral position rather than an arch position through that whole long length. And then we're adding the additional challenge of moving the body in space. Right?
So thank you all for attending today and I really hope that you'll be able to take this information and understand a little bit more about your spine and be able to really look at when you select exercises, right? What the exercises would be most beneficial. How you can make those goals really be met with effective queuing from an anatomical base that you're able to look at alignment problems and think of constructive ways of helping to improve those conditions that you understand a little bit more about the risks that's associated with exercises and easy modifications that you can do. And last but not least, that you can progress exercises so that you can have someone gain benefits for decades of enjoying the wonderful world of potties. Thank you.
Continuing Education Credits
If you complete this workshop, you will earn:
4.0 credits from Pilates Alliance Australasia (PAA)
The Pilates Alliance Australasia (PAA) is an independent and not-for-profit organization established by the Pilates industry as a regulatory body for control of quality instruction, member support, and integrity within all legitimate approaches to the Pilates Method.
3.0 credits from National Pilates Certification Program (NPCP)
The National Pilates Certification Program is accredited by the National Commission for Certifying Agencies (NCCA)
Workshops - Playlist 4: Anatomy and Fascia
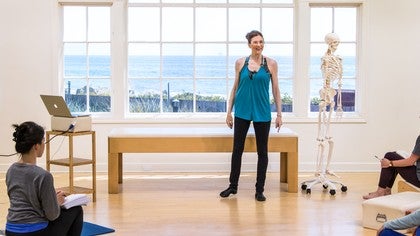
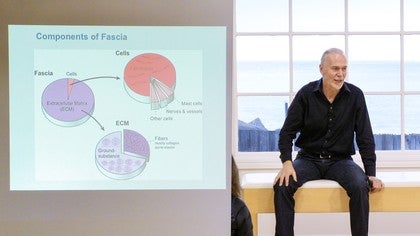
Mention
 |
Karen Clippinger (Teacher) |
 |
Paula A |
 |
Gia Calhoun |
|
|
Bruce C |
|
|
Natalie W |
|
|
Ivette T |
 |
Louise P |
|
|
Helen B |
|
|
Victoria S |
|
|
Joanne Smith |
|
|
Melissa P |
|
|
Yvonne C |
|
|
Teresa S |
|
|
Lila A |
 |
Silke L |
Comments


So sorry to hear this. I will let Pilates Anytime know today.
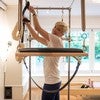


Silke ~ I'm sorry you had trouble with the previews. I have sent this to our programmers and it should be fixed shortly.
Lila ~ I tried chapter 2 and the sound worked for me. I recommend checking your settings to make sure the sound is all the way up on your device and the video. If you continue to have trouble, please email us at support@pilatesanytime.com.
Thanks. Hopefully all will be fixed soon.
Lila and Silke:
Thank you for letting us know.
You need to be a subscriber to post a comment.
Please Log In or Create an Account to start your free trial.
