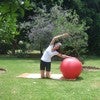
Description
This video was provided by Kathy Corey.
About This Video
Transcript
Read Full Transcript
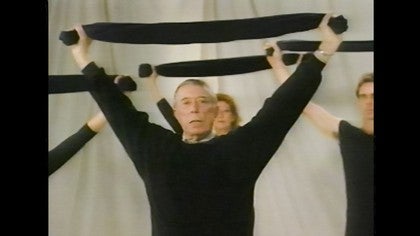
Ron Fletcher was born in Dogtown, Missouri, May 29th, 1921 his artistic personality was apparent at a very early age. Ron arrived in New York in 1944 he was a student performer and teacher with Martha Graham. He was the lead dancer and oral choreographer for several Broadway shows, including the loot song, top banana and two on the aisle. Ron received an honorary ms degree as a teacher and choreographer at Utah State University and he taught master classes at ballet arts studio 61 and Carnegie Hall. He cofounded the choreographers workshop in New York. Ron was a lead dancer and choreographer for the Ron Fletcher dancers on the NBC All Star Review With the little bank head, Groucho Marx, Ethel Barrymore, and Marlena Diedrich.
He was the director and choreographer of the ice capades for 12 seasons and for two years was the choreographer for 20th century Fox studios. Ron Produced, directed and choreographed shows in Las Vegas, Paris, Milan, Beirut, and London as well as New York. In 1948 Ron Fletcher began to study with Joseph and Clara Pilatos because of a chronic knee injury. Joe was a miracle worker at genius. Ron says, and he inspired me to learn more about how the body should work. Ron opened his studio for body control logix in Beverly Hills in 1978 Ron's book, everybody is beautiful, published in 1978 features, Britt Ekland, Candice Bergen, Ben Vereen, Katherine Ross, and Allie McGraw to name just a few of the celebrities who appear on every page and still remain loyal to Ron and his teachings. The Ron Fletcher work is up comprehensive movement experience, creative, constantly evolving.
It has been developed over a 50 year period of teaching and study with such visionaries as Martha Graham, Joe and Clara Polato says, yeah. Ichi Nomura and Agnes de Mille.
I'd like us both to all of us while we're here. First of all just to take a nice deep breath just in celebration of the body and movement
If you really put the weight on those two triangular basis over the big toe, the little toe in the center of the back of the heel, you can feel a very, very, very, very solid base there on which the building is built. In other words, that is the foundation of your building. Now if you lowered the toes down to the floor and pick them up again and lower them down and pick them up and lowered them down. Now we're going to take a breath as we lift the toes up and exhale as you lower the toes down. Inhale as you pick them up, exhale as you bring them down and inhale and exhale.
Inhale and exhale. Inhale and exhale. Now take the toes off the floor, hold the position, bring the knees very tightly together as though you're holding a thin piece of paper in between your knees. And we wanna try to lengthen the fine muscles as much as you can coming up into the trunk of the body, tighten the butt muscles, being very careful that you don't let the body tilt forward like this but keep it very even and very straight centered. So we have a, at these two points is though some forces coming in from these two points here and a bolt that bolts, you're here from the pubic bone back to the tailbone and that uh, those four forces coming in from the front and the back to here, two sides into here to form a solid core on which the body is standing. Uh, this is built around the, the basic architecture of the building so that when you plea a or whatever move you make, you're moving really on, always on that center and it gives you that kind of strength and that kind of feeling of freedom and power in the body. Now we're going to go a little bit further with the foot, uh, placements so that you can feel a little bit more the awareness.
We're going to roll up to the brawl of the right foot. Now make sure that your right over the foot center and those of you in the front would you just roll out to the side? We want to show you what is not the right way to do this, to roll out to the side or roll to the inside, but stay right on that foot center and roll it down. Now we want to roll up onto the left and roll it down and roll up to the right and lower the left and lower. Now we're going to add the breathing and lift and lower and lift and lower and lift and lower. Now to continue on up with the alignment of the body, the belly pulled back toward the spine. Nice and straight mindsets.
You don't tilt, uh, get as much space as you can in the middle of the body so that there's as much space between the rib cage and the bone and the hip bone here as possible so that the body is really lifted up, away from the hips so that uh, kids let it go for me for one minute and just sink down so you can see what most people do to varying degrees. The body's doing this part. A lot of that is just plain old gravity. But if you lift up from here, you lighten the body and it gives the body much more freedom. Now we want to lift the sternum up nice and high. We want to drop the shoulders down. You want to bring the head back in line with the spine and keep the throat nice and long and open so that you have as much space as possible between the ear lobes and the shoulder joints.
Here though the body is nice and straight and lifted. Take the toes off the floor, lifting arms just a little bit to the side and lower lift and lower and lift and lower. Very Small Pa. Bend the knees, hold them tightly together. Really feel that solid, that core coming up to the center of the body that's nice and straight and held together. The belly. Pull back toward the spine and lift up and down. Okay. Now we're going to step back over the towel to start, uh, with some explanation of what I call percussive breathing. This is something that I developed some time ago because every teacher, our everybody says to you, breathe, breathe, breathe. Well, we know we have to breathe, stay alive, but they don't often tell you how to breathe.
We don't understand enough about the actual breathing apparatus and how it works. So over a period of many, many years of teaching and working and dancing myself, um, I developed something called percussive breathing. So that percussive, because it has a sound and it has a rhythm. It has a beat. It looks and sounds like this when I'm doing it. Yeah.
The group will join me and we're going to take it up to six counts of percussive breathing. It starts like so.
Now the towel is directly above the head, drawing a line that's parallel to the ceiling. You're going to keep the shoulders down, pull the belly back toward the spine, pull the towel very taut and as you do, pull it Taut so that you can feel the engagement of the muscles in the upper arm and then release it as you tighten the towel. You take the air in
Very taught on an inhalation. Drop it behind the head on an exhalation. Close the elbows in on the inhalation. Open on the exhalation. So it goes like so.
Open and lift and hold and open back again to your second position.
And then turn to the front and to the right and front to the left and front and to the right and front. That way
Now we're going to try for a full rotation and the shoulder giants take this easy. Take an inhalation up.
Said, the towel goes all the way to the back and lifted it up.
Those of you who are watching, I'd like to just repeat the uh, information about the body, but postural alignment in the body center, even though you're sitting on the floor, I don't want you to think that you're [inaudible] because you're sitting that you can slump the body down. If the group behind me would just do that with me please. You'll see what kind of dreadful poopy shape we're in here when we do this. So you need to really sit up very high over these sit bones here so that it's up nice and tall as though you're using the floor to rise up from rather than to sink into, do you want to still have that nice tall lifted position with the space in between the ribs and the hipbone here so that we're nice and tall. The sternum is lifted up nice and high.
They head back in line with the spine and we're nice and tall and lifted as though something is lifting. You hear from the top of the back, the head and we're just kind of almost levitated in space there so that the floor is what we work up from. We're going to take the Percocet breathing now starting with one and going up to six. Keep the palms open as though there's a wait in the palm of your hand. So you have to lift up through space.
Okay. Bring the right arm up and over. Now just twist the shoulder a little bit. This way. Bring it back and place. Circle up and the shoulder over to here and lift and place. Stay nice and high on the body. Now this time we're going to lift up. You've got to make a deep contraction and reach out.
Keep both bones on the floor, but you're reaching for away. Allow us to stretch the right side of the body. The arms should be between the ankle and the knee and you're reaching one, two, three, four. Now a nice strong lift, lift and open. Inhale. Exhale.
That is that where the belly and a concave there. Now you're gonna release that is straightened through the spine and set the feet flat and you flex a feed back and contract back and let the head come forward and release and place and the breathing goes
Bring the feet together and release. Stretch over to the side. I'll try to keep the shoulders to the front and bend the knees. One, two, three, four and center. And to the left, two, three, four and center. And to the right to let me hear the breathing.
So nice straight back. Now tighten the button muscles, pull in the belly, round the back that the head come forward and reach forward. Put the hands on the ankles. Now don't pull against the ankles pro. Uh, Brett we're aiming to do here is make a gentle arc, a curve from the tailbone all the way up through the vertebrae here through the end, the top of the back of the head, you have a nicely rounded bridge that the convex line there matched by the concave line that we're trying to make from the in, in the, where the belly is and the other parts of the body on the Ed side. So keep pulling the, the um, the lower belly muscles back toward the spine. Now we're going to hold that for eight counts. One, two, four, five, six, seven, eight and then with a very gentle, easy pulse forward from the hip flexors run two, three, four, five, six, seven, eight.
We're going to roll the spine up very slowly. Roll it, run, roll it up to roll it up three and lift up on four and circle up. Tighten the bud, pull in the belly, round the back that the head come forward and take the whole body forward. Forward, forward, forward to here. And your s your little pulses.
Good. So the arms are straight up from the side. The chest is nice and open the shoulders down and we're going to reach back very strongly as though you're slicing through space with the sides of your hands. Don't let them come down here, but keep them up here so it reaching back.
[inaudible]
Now this is going to be four little pulses. Run two, three, four and roll the spine out. Keep it round. Keep the shoulders down and try to touch run bone at a time. One, two, three and stretch back on four. Now hold the diamond shape there and really hold onto the lower abdominal muscles because you're in a circle. The arms on run lift. They had to come up three and over on four and one, two, three and four. And Roll it back to three and reach back on four circle.
The arms run. They had to roll up three over four and one, two, three and four. And Roll it back to three and a stretch back four and circle run. They had to come up three over four and run two, three the last one, roll it back to three stretch four circle the arms run, lift. They had to come up three and over on four.
Now for those of you who have trouble, uh, rolling up on the, on the contraction and the, and the roll up from there, uh, it's a very important piece of movements. So I would hope that you'd give, um, some time and attention to it. It's much more effective to build the lower abdominal muscles here, uh, especially in the female body, uh, to, uh, build this girdle of strength across here and to get a more, uh, flexibility in the spine. So if you have trouble getting up there from the beginning, let me show you how we can give ourselves some help though. If those of you will of the group just roll back to three and four and then as you're coming up, circle the arms one. They had to to put the hands on both legs just to give yourself enough boost up and as soon as you can let go and reach forward. Run two, three and four. Now rolled back one, two, three and four and circle the arms.
Run to the thighs to lift three and over on four. Very good. And roll the spine up to three and four an open and down. Pull the feet in, close to the crotch of the body and stretch them. Open two, three and four. Bounce the knees slightly to try to get the legs as straight as you possibly can, especially in back of the knee.
And this little muscle right here on top of the knee cap so that the knee is not like this and the feet flopping here like dead fish but really pointed very strongly. The legs are nice and open. Open, open, put the hands in back of you, keep the back straight and just push forward a little bit from the hip flexors. Stretch two, three, four, five, six, 7:00 AM. Sit up straight and lower. Lift the arms up.
Flex and point and flex and point. Keep them pointed. Lift up out of the middle of the body and stretch over to the side. Try to keep the arms parallel and in line with the year so you don't fall forward like this, but keeping it nice and open. Now don't stretch. Don't stretch too far if you can't make it, but I'd rather keep the body straight and keep the arms and this alignment and feel the stretch coming out of the hip. Two, three and four and center and out of the hip. Over one, two, three, four and center.
Now on eight counts, lift up and over. Run two, three and four. Five and six and seven and eight and center and over. One, two, three and four. Five and six and seven and eight and center and open and bring them forward and breath. Bring the palms of the hands down and bring them up. And to the back, flexing feet back. Just lift the butt off the floor slightly. And Lord, take the arms away, but the hands down and lift the bucket up.
Set the boat down and lift up. Point the toes, bring the legs together. One, two, three and four. Now contract deep contraction. Keep the arms low, keep the feet pointed the ankles together and roll down one bone at a time. Run, roll it down to the arms. Come straight up on three and turn and place the palms down on four. Bend the knees and pull the feet in towards your butt and then extend them straight up in the air and try to think of your body as an l shape. So the body obviously is the base of the L and this forms the rest of the l and a, but keep, don't let it go back this way are coming forward, but just absolutely straight up have flex the feedback and point, flex and point. Flex and point and flex. And Pike.
Now turn out from the hip joint and open the legs to the side. Put the hand on the inside of the leg behind the knee and lift the head up. Hello and stretch. Run two, three, five, six, seven, eight
One but the head down to three and hold on for now. Lower the right leg down. Run and lifted up to the other one on two. Inhale as you lower down.
Lift left and lift the right. Let me hear the breathing. Darlings left and lift right. Let me hear the breezy left and left.
Now bend the knees and just touch the toe tips to the floor and stretch them up and touch them down.
The last one left and together come into your diamond shape. Upside down. Put the hands on the knees, bring that roll back a little bit. Bring the head up and come up to your diamond position. Slowly. Three slowly four circle and place. Now we're going to go into the hip lift, so we're starting on and we'll go over to the left side through leading with the right arm across, ready and over two, three and four.
Five and six and seven and eight and circle and center and run. Two, three and four. Five and six and seven and eight and circle and center. Now four with the hold run, two, three, four and hold two, three, four and seven two, two, three and four and reach to three four and hold two three, four [inaudible] two, two, two, eight and twos and one, two and hold on to and center on two and reach to and hold onto and center on two and circle up and over. One, two, three, four. Now we leased through the spine at least one, two, three, four and lift two, three and four and circle up
Come onto this position, curl the toes under you and hold the ankles tight together as you push back. So you were sitting on your heels that the head come forward to in this very small little position, eight little bounces the butt to the heels.
Pilates Legacy Project - Playlist 7: Ron Fletcher Practices
Comments
You need to be a subscriber to post a comment.
Please Log In or Create an Account to start your free trial.
