Description
About This Video
Transcript
Read Full Transcript
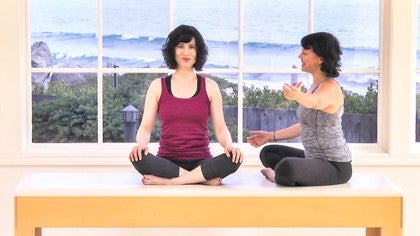
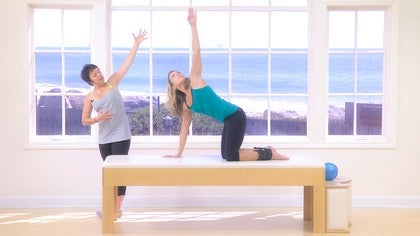
Hi, I'm Kara Reeser and I'm here with my dear friend Karen wonder who teaches pilates in Los Angeles. And um, we're gonna do some of a little spit of the Cathy grant before the hundred material. So before the hundred, Karen, um, was a large repertory of work that Kathy developed over the years and developed primarily for the dancers in the classroom at Tisch School of the arts. And the idea was that we would learn, it took us the whole semester basically to learn the step-by-step skills that allowed us to perform the plots repertory eventually. And um, as a matter of fact, it was the last day of the semester when we finally, for the first time, went out and did the traditional plots, these, but we had used these step-by-step skills. So we're just going to touch in with a couple that to me feel like really essential in, in what it takes inside and out to do Mr [inaudible] repertory. Okay. So we're going to do breathing.
We're going to do some centering work, which was always the most important thing to Cathy is that the body was aligned. And that meant alignment physically and Amal. Alignment also awareness wise. So we're using the right amount of tension, attention to ourselves, um, and being able to know just sort of a relative sense of where center is. So we'll do breathing some centering work and um, some head lifts and then we'll finish with some setups, which she, the, my name is set up what you know, which she was famous for. So, um, we're gonna start with breathing. Okay.
So we're going to start with the percussive breathing and it's, this has got two phases to it. The first round of because of breathing will be distending. So let your tell me all the way out. And then on that exhale you really pull it in, right? The second round you don't distend anymore, you just, so it's really where you're learning how to do the Palabra, these belly button to the backbones type of thing, but still get full breath in the, in the, in the body.
So we'll do around. It's also got some rhythm to it, but we'll do around five within and out. And then we'll pause and then we'll do the keeping it in, but still pulling it back on the exhales. Okay. So this is the Percocet breathing. So we're going to start with an e. Let's go ahead and start with our hands on our tummy and go ahead and bring your hands a little lower. So we want to use that low apps. So we're going to inhale.
There's five on that fifth when we keep that air coming out. So let's do it now. We'll do it without pushing the abs out. So we're going to go inhale. So really quick. Let's do it again. Inhale.
And then oftentimes the next thing that would happen is that we would find a side that was tighter. So did you feel like a side right or left that didn't move as well? Yeah. Okay. So now we're gonna do left side according to him. Breathe in. So you'll, you're going to use both hands still stabilizing your right ribs with your right hand and let's get that movement in that tighter sides. We're going to inhale, one, two, three, four. Excellent. And n good.
And the exhale you could think of coming out of either the front or the back. So for you, I'd like you to exhale between your shoulder blades. So when you exhale, yeah, and you let the air out, like you had a little hole back here. Right. And that's just going to bring you back into center. It's beautiful. One more time and great and rest gorgeous.
So it's often the case that that breathing would be used for scoliosis or somebody had an imbalance. You could do both sides and just a normal practice. But just working to, to really work the movement on both sides, which, which I use with everybody actually has some imbalance. Right. So, um, okay. So the next breath I want to do with you is the ball breathing. Okay. And so the image of the ball breathing is, we're taking it, she used to say it was like, you know, you're taking a big heavy medicine ball on the inhale in. And then on the exhale you imagine this sort of wrapping around and spreading out of the, the back safe crumb. So you inhale and you pull the ball in.
Good. And then you exhale and you just spread. Right. So let it be an image. Try not to overdo it, but just take it in. Inhale and XL let it spread. Great. And sometimes I even use my hands, Karen too, to give myself like a pantomime Saul inhale and then the spreading comes around the back.
So there's a a releasing around the back. Yeah. And not particular breadth we used for inversion work mostly anytime we were short spine or shoulder bridge lifting our, our tush up, you would take the ball in and then on the way down you would spread out and that would keep that little bit of QC that how we like keep a little bit of that lift. So that as you came down you didn't come collapsing down. But that ball breathing gave you something to wrap around to. It's kind of like concentric ripples. The next thing we're going to do, which could have been the first thing it could go either way is Kathy's song. And the song is really about, um, Kinda, I, I call it like an internal gps now.
It's a way of just sort of getting yourself organized on the inside. So as you're doing this, I am not looking to see you. Do you know, a big movement. It's just what it feels like. The what, what they really, if you really do them, what they would feel like in you. Okay. And I usually pantomime again with my hands, so you can kind of do that if you want. So it starts with the, so you want to do your best to really get in that, that center of, of your central axis as you're starting. And then the first one is to think about zipping and you're zipping a zipper that starts from your pubic bone to your navel and you zip. Yeah. But you can still breathe and talk and go to the party. Right?
So it's not like not that type. And then the next one she would tell us to bring our navel towards the lowest part of our waistline. So there's small, diagonal downwards and you can still breathe and stuff. We have the fire it. And then the next one was to put your belt on and the belt is actually between your ribs and your pelvis, right? So it's an old fashioned style belt, high-waisted. And when you get that belt on, you're lifting your ribs off your pelvis. The next image was the image of putting your vest on and you could button it, you could zip it. I like to think of my vest coming up quite high.
And that's a sense of really bringing the carriage into elegance, she would say. And then the last one was the tape measure. So the tape measure is this feeling which you actually need, which is this idea that like if somebody were coming around to measure your rib cage right in a, in a, in a dress, you know, dress shop, you would just, jelly couldn't take your arms up. It's gonna be an easier way to do it. So then they bring the tea and you just sort of shrink and you just gently narrow across the ribs and it's, it's whatever that feels to you. And then just let your arms come down. Great. So now I'm just gonna ask you to drop your head and you're gonna come down into it. Just kind of a slumped position. Yeah.
And this is what we'd call subway heading. Kathy's work, right? So that's why I give you fell asleep on the subway. It's a real New York city image. And then you're going to just do the song to bring yourself to center. So you're going to, you can leave your hands relax this time.
Just do it on the inside. So you'll zip, uh huh. That's right. And then you'll bring your belly button to the lowest part of your waistline, put your belt on vast tape measure. And then the last one, she would say, pretend you're Dorothy and the wizard of Oz and you're flying up, up in a way. Right. But you could still have fun and breathe. Right. Okay. Excellent. That's the song.
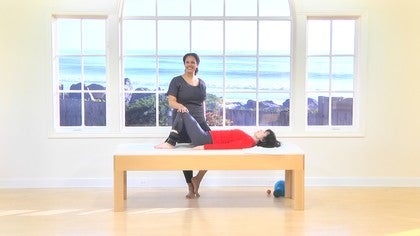
Their fruition is to bring you into the, my name is set up, which is again part of the before the a hundred repertory. Um, but there's a couple of things I want to just make sure we have in our skill bag before we, we get our are set up on. Okay. So we're going to do slammed board pelvic tilt so that we just know how to change the pelvis. We'll do some, we'll do head lifts and then we'll bring you through to the setup. Okay. So I'm going to put this ball in here. Um, just as a space hold. Basically we often used something here. This is going to help you even out some of the work and we'll put your hands up on your thighs. This is called slant board pelvic tilt from before the hundred.
And what you're basically going to do is your, your normal sort of pelvic tilt. You're going to use your arms as the guide to where your pelvis needs to come. So you breathe, and then as you take your exhale, you're going to go ahead and bring down from the breastbone away from the Chin first. There you go. You can go a little faster. You don't have to torture yourself. That's it. And down right again. So you're going to just let that come up. Now do that ball breathing.
Here's a great opportunity to feel that. So you're just going to inhale, take that ball in. Good. And you don't have to labor too much. Axelle slowly bring the breastbone away from the Chin to bring you down. That's great. Let's just do that one more time. Push your feet down. Don't work so hard and let your pelvis change. Inhale. That's beautiful. Great. And then exhale, breastbone away.
And then wide and Accra, that was right. Wide widen across the back of the pelvis. Beautiful. Okay, so now go ahead and straighten your legs out. Let's talk about lifting the head. Okay, so in Cathy's work, really, really important to know how to have a good head lift and to know where your head is. So we're going to do our one through 10 set up, which you know, right. And our head is one and two. Three is the sternum, four is right around below the breasts.
Five ribcage. We're going bands six, seven. You know it's sort of an individual and I think you know where your bands are. Eight for me is around my naval, nine below 10 right around the pubic synthesis. Okay. So, but what we're going to capture right now is making sure we really know how to get those ha that had lift up. So we're going to do head lift one and two to number three. Okay, now I'm going to cut. Yeah, I think that's a great idea.
I'm going to just remind you how we do this Karen. So I'm going to have my hands back here on your, the asa put on the ridge of your skull and our first gesture is to go one, which is to rotate and lift. That was excellent. And then the second part it's just had number two and then we'd come out, we'd go to, and then there's rotation again. Exactly. And that was really important. You know that we didn't push the neck back, you know, so we're going to go head lift one and two. Good. And now we're going to come into number three head right there.
Now your eyes are looking straight out. Yeah. And we'll come up. Let's come up to number four. You're doing such a great job for great. And come back down for three. Now remember to now one that had spirals. Gorgeous. Great. How's that feel? Great. Okay, so now, um, we're gonna just do that one more time.
Go ahead and straighten your legs. This is just another way to, to play with this. If you want, put your feet together. And if you're not sure you know exactly how to do this, you can really flex your feet and you can look at your toes. So you can go one and two and you're right there and you're in your head left to right and then you come back down. Gorgeous. Okay, so that's just another option for your head left there. Okay, so now let's just review paintbrush for eyes. So I want you to take your right knee into your chest and roll up to seated. This is probably the most important to me.
Cathy grant had alignment cue, which is to visualize. This is your canvas in front of you that you have two pain pressure's coming out and your, as you roll up and down for your Cathy grant sit ups, you're going to paint up and down that wall. Okay. So we're going to just go right into it. I'm gonna hold your feet, scoot forward a little bit now. Um, and we'll start our, our, my name is set up for right now. We'll just go down with the numbers and then we'll follow through with the, with the name, etc. So I'm going to bring your legs together right now. Kathy grant would often say your inner thighs should be friends.
If they get together, they might like each other, right? So you're going to hold that feeling of support there. And let's take your arms in this kind of classical yeah, yeah. You're going to get, yeah, you're going to get that, that song on right away. So your alignment is key. It's alignment first. So you're here, you look good, and then you're gonna start to tip back. And we're going to go to ten first. So you're going to change your pelvis, you're gonna let yourself come down 10 I'm gonna take you down pretty slow so everybody can see. And then you're going to come down to nine.
Great. And you're going to come down to eight and you're just going to bring that sacred all the way down and you're going to stop. And then you're going to come down to seven. Good six there's your paintbrush. Fry's good five. Now you know where four is. Go to four, go to three. Now you have your head lifts. Go two and one. Beautiful. Now you're going to talk with me this time, Karen, but don't say one and two because you're using your throat tissue.
So we're going to be quiet. You'll all say one and two and then we'll say three through 10 together. Okay, great head lift one. Now go back for a second. Remember when you're doing those headlights, you don't want to change your torso too much, right? So I'm going to come around and just help you find that again on this end. So you're going to go one, two. Perfect.
Now we're going to sing it together. [inaudible] say it out loud for now. Paintbrush for eyes. Look at me. Five. Keep going. Six. Chin up. Seven. A eight, nine. There you go. 10. Good. So now let that breath move through your voice. Okay.
That's the whole reason for talking and Kathy's work is to not struggle. So try to let the breath move. Let's hum together on the way down. Also, very typical way that she would have us go through these setups. You get to take a deep breath in with me.
That's it. And I'll say it out loud with me. Three. Let the air out for, sing it. Five. Six ayes of it. So hard. Seven a ties up. Nine and 10. Great. And you have the song gone and now let's just finish with the very classic Cathy. Grant version, which is your name, your address. Oh wait, we're on TV. Maybe we should like, we won't do that one. Okay, we'll have one more time. Here we go.
Pilates Legacy Project - Playlist 2: Kathy Grant Methods
Comments
This was so helpful when viewing Kathy's mat class....now the ball breathing cue makes sense to me. I bet you hugged her as often as you could....she appeared tough but I bet she gave great hugs. Cara you have really demonstrated your own strong gifts of teaching and expression of movement but you have represented your roots with Kathy so well!! Thanks for all of your hard work to share this!
You need to be a subscriber to post a comment.
Please Log In or Create an Account to start your free trial.
