Description
About This Video
Transcript
Read Full Transcript
Hi and welcome to my tutorial on spine extension or back extension. I am assuming that you are already a well-versed Pilati student or [inaudible] teacher because being on your stomach is one of the hardest positions there is for your body to really have strengthened your powerhouse. When you first start off doing PyLadies, we always lie down flat on our back and that allows gravity to help pull in our powerhouse and to deepen that connection. And then when you get a little more advanced than we lie you on your side and we start doing sidekicks and things like that. And then the ultimate is being on your belly, which is what we're going to be going over in detail today.
So hopefully you are a well-versed [inaudible] student or teacher and you're not just jumping into this. And again this is a tutorial, not a mat class or a workout. Okay, so we are going to start off on your back. I just want to share a few things that I know about your Spec and hopefully it is going to allow you to develop some great back muscles that we really need to have to stay healthy and strong, as well as to not compress in our lower back. So we're going to start today building awareness with our pelvis and a pelvic clockwork, which I love to do. So I want you to think about your pelvis like a clock. And that would mean that your belly button would be where 12 o'clock is and then your right hip bone would be where three o'clock is and then six o'clock would be your pubic bone or your tailbone. Nine o'clock would be your left hip, and then 12 o'clock would be your belly button.
So we're going to, right now my heels and my hands are going to be on my hipbones and I'm going to point towards my pubic bone. And as I feel it, I'm a little bit tilted in my pelvis, meaning my fingertips are a little higher than the heels of my hands. And I want today for it to be even. So I'm going to make sure. There we go. I'm not tilted towards or away from me. Okay. Now I'm going to allow myself to tilt my pelvis towards me.
The heels of the hand should go down. The fingertips should go up higher like a seesaw on the reverse. Fingertips are going to try to go down. That's a really hard one. A lot of us do more extension with our upper back than our lower back. When we do this, and we're going to go the other way, I'm doing pelvic clockwork to start because when we do an upper back extension, when we're on our belly, we don't want it to come from our lower back and go the other way.
We want to stabilize with our powerhouse and stabilize with our back rather than moving it. So now let's go just to neutral, where your fingertips are the same height as your heels of your hands. And I'm going to want you to tilt your pelvis all the way to 12 o'clock to do that clockwork. So we're going to tilt your curl, your tailbone towards you, curl it, curl it, curl it, and you should be very aware that your waistband is flat on the mat and that your bottom's a little lifted. Your tailbones a little lifted. And we're going to roll through our lower back and go down with the right hip and the left ones up. It says, if there's a seesaw right here, and this person is down on the ground in this person's head, their little legs are hanging up off the floor. And now we're going to roll through our back of our pelvis down to our tailbone where six o'clock is rolling through the left lower pelvis over to nine o'clock so now the left hip bones down the right one is up, and we're gonna pull our belly in more than clench our hip flexors to get back to 12 o'clock. Notice I didn't let my knees just completely flop to one side. They do move a little bit, but they don't need to. They're not going to go lead.
They're not gonna lead. Let's go the other way. So we're going to go to nine o'clock rolling through our lower back, the left hip bones down the right ones up. We're gonna roll down through our to our tailbone, which is six o'clock we're going to press through, or a lower pelvis onto the mat as we go over to the right hip bones down the left. One's up, there's a little seesaw and we're going to pull back in to 12 o'clock. Hopefully not by pushing the feet so much, but by pulling in your belly, maybe using your bottom a little. Let's go one more each way. To the right, we're gonna circle to your right hip bone down through to your tail, tailbone over to your left hip bone and center. This is pelvic clockwork going over to your left hip bone, down to your tailbone. Just an awareness exercise here, right hip bone and back to your center. Great.
So just awareness so that when we flip over onto your stomach and gravity is no longer on our side, I want you to be aware of what your pelvis is doing because most likely you're actually going to have your tailbone like this where you're dumping. If you're pushing your pelvis away from you and your lower back, there will be a big tunnel here in your belly, is going to kind of be pushing into the mat. And we want to be doing almost the opposite where we're pulling our belly into our back. Maybe even create space in a tunnel underneath our, between our belly and the mat. And you want to feel like you're squeezing your pubic bone down into the mat when we're flipped over. So we're going to revisit this right now as we turn over onto our stomach and do the more challenging work, more advanced work that I was telling you about.
So to start off with, I want you to straighten your arms and straighten your legs. And we're gonna start here with kind of a physical therapy, more um, version of swimming. So we have our box, a straight line from one shoulder to the other shoulder. We have our hip bones and they form a box. I want you to press your arms into the mat and I want you to squeeze your pubic bone and bottom into the mat and create a tunnel under your back and release. And I want you to press draw your shoulder blades back towards you.
Pull your belly in, Butt, squeeze your bottom down to your belly, has something to pull up against and release. So now imagine you didn't do that. We have very good pelvic awareness and the other version would be kind of like lifting your tailbone up like that, right? When we lift up our upper back, and it seems silly right now what I'm doing. But you're going to be tempted to do that. And instead you need to stabilize. Whenever you lift up your chest by squeezing your bottom down, pushing the pubic bone down into the mat, drawing the belly button in and using that strong stabilization, that's what's going to end up lifting you.
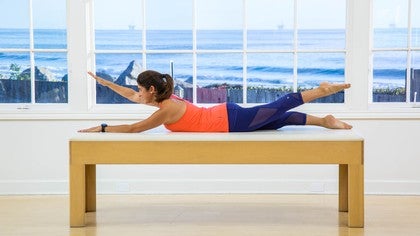
So we're gonna end up regaining that position, but we'll lift up just the right arm. Okay. So my head's going to go down and I want you to draw the shoulder blades back as you press down into the mat, squeeze your pubic bone down, squeeze your bottom down into the map, create a tunnel under k, keep your pelvis like that. And we're going to lift up the right arm and the head and down. And I want you to press your left arm into the mat and we're going to squeeze your bottom down, scoop your belly in and lift up the left arm trying to say square and release. It's not easy. Maybe you can add lifting the opposite leg.
So we're going to squeeze stabilizing that pelvis, scooping in and sliding those shoulder blades back to get link. Also, you really want not to have, you want to feel like you are lengthening your spine out the crown of your head. And that opposition of point, the map behind you with your shoulder blades really helps. So let's squeeze down, scoop in and lift the left arm, leg and right arm and yeah, and we're gonna press the right on bottom, belly, left leg, right leg. LinkedIn's going to pull up and yeah, there's a lot of work, a lot of muscles. And one more set scoopin while you press down.
Okay. Pull those shoulder blades back and we're going to lift up right arm as the left leg lengthens out and down. And one more time. Pubic bone, glutes, stomach. And we're going to pull those shoulder blades back and we're going to use that feedback to Lyft, Lyft, Lyft, and Dan. Go ahead and round your back for a second. Give yourself a break, sit on your heels if you can.
You can also grab back here if you have bad knees, don't sit back too far. You can also add a stretch like this. Okay, we're going to go back and now learn about neck roll. So I want your arms to be like long by your side now. And I want you to squeeze your bottom down into the mat and want you to press your pubic bone down. I want your belly to try to create a tunnel. And I even want you to reach your thighs long out of your hips like a Mermaid's tail. Okay, the arms are here. Hold two, three and release everything. So press the pubic bone down, squeeze the bottom length, and as you pull the belly, not just in, but up at the crown of your head and release.
Now I want to add the shoulders and opening the collar bones. So we're going to press your pubic bone down. Squeeze your glutes, lengthen out scooping, and now find a pencil between your shoulder blades and squeeze it. Now be aware of your pelvis and we're gonna pull your belly in to lift up your head, to lift up your upper back. Nothing changes in your pelvis and come down. Your lower back doesn't get shorter and compressed.
It stays long because you're pressing your pubic bone down and squeezing your glutes and supporting with your stomach one more like that. Squeezing that down, pressing lengthening tunnel. Lot of work going on. Squeeze a pencil and use your belly to lift your head. Use your belly. They go that swimming come down now bend your elbows and if you have a really flexible, double back, keep your hands right under your shoulders. I don't.
So I'm going to bring it a little forward and a little to the side. Okay? But we're still going to do everything. We just did it. So press your pubic bone down, squeeze your glutes, Linkdin, those legs. Pull your belly in and slide those shoulder blades down, right? And we're gonna start pulling up our head with our belly. Cara, Belize lifted off the Mat right now, lifted. And then when you can't lift any more with just your belly, add your arms, but you're still lengthening your energy out the crown of your head.
We're going to look to the right shoulder that they didn't move. Circle down around. Look over your left and look forward. The shoulders stay square and stationary. As you look left, circle the head down around, right. I'm trying to keep squeezing my bottom and lifting my belly. More importantly right now, I'm going to lengthen my belly all the way up to the crown of my head and down.
He even love to pretend my hands are like two big suction cups and I'm pulling the mat behind me as my spine lengthens. Creating space between each vertebra. One more time. We're going to press down. Squeeze the glutes, right, linked in those beautiful legs. Draw the belly in. Pull them out behind me and lift with my belly. When I can't lift anymore with my belly, I'm going to keep lifting and lengthening my arms.
Let's look left first left all the way around. Look forward a quick belly check. Is it in? Look right all the way down. Look left and forward. Now pull your map behind you. Scoop your belly and your bottom still working, still working and damn.
Ideally your legs stay together too on that one more child's pose. Since we detailed it so much, just go ahead and sit back and stretch. We're gonna do a little single and double leg kick just to throw it all together. Know that when you do a back extension of another factor is how stretched and flexible the front of your thighs are. If you have really tight quads, it's going to prevent you from doing a really good then too. So make sure you're stretching those. All right, so because of that, we're going to do single and double leg kick.
So I'm going to shoot back out onto my elbows and I'm actually going to push my knuckles together and heels, um, and my elbows down on the mat. I say shoot back out because in Romanos Palladio's this transitions really quick and it's very effective to making sure you stay your belly scooped in and your bottom pressing down rather than just kinda giving into the mat. And then regrouping. Okay, so on the count of three, we're gonna shoot back out. We're going to go one, two and three. So we're here already. Pubic bone down, squeezing your glutes, lengthening your legs, belly and pull those shoulderblades. Lengthen your chest out.
Let's keep the legs lengthening. How's your pelvis? Did you switch it? Is your pubic bone still down? Lengthen your right leg to pull it in for one to reaching the left. One two. Now I don't squeeze my one cheek, not the other. Both are squeezing down Belize. Trying to lift up off the mat. Lifting up off the mat, maybe even lifting the thigh and knee up off the mat.
Lifting off the mat both cheeks squeezing down. Lengthening. One more add right facial cheek on the mat. I'm not able to talk much on my right cheek, so I want you to, I'll start on my left then. So I'm gonna start with my left cheek to explain everything is all sun relaxed, right? Cause we're in a tutorial. But ideally when you transition, you want to make sure you're still engaged. What are we going to do? Squeeze that pubic bone deck. Squeeze your seat length your legs, create a tunnel. All of this is very active, stabilizing, helping us get a stronger back. Hands one over the other, behind your back.
Elbows down as you can and we're going to lengthen that mermaid tail and three kicks. Notice how much I'm pushing my pubic bone down. Notice how much I'm working my seat as I squeeze two, three, no light under my hip bones, and now I'm going to reach along those legs as I pull my arms long and try to lift with my stomach and switch and press the pubic bone down. Lengthening up. See, I'm pushing my pelvis down to lift up my upper body. One more set. Bend the elbows, press your pubic bone down. Squeeze your bottom length in that mermaid tail, Eh, kicking one, two, three. Notice I didn't even bounce forward for three counts. You Bet.
Pull into the mat, into the mat, into the mat, right? We're going to call it into the mat, into the mat, into the mat, and then that presses down into the mat to use our belly and one more time and press the pelvis down to lift, lift, lift with your belly, round your back, sit on your heels. That was a lot of detailed work and I hope you got a better understanding of how you can stabilize with your pelvis to use your belly to lift up your chest, and that is how you should be getting your back extension. I'll see you at my next tutorial.
The Successful Beginner - Playlist 7: Movement Breakdowns
Comments
You need to be a subscriber to post a comment.
Please Log In or Create an Account to start your free trial.


