Description
About This Video
Transcript
Read Full Transcript
Hi. Today, what we're going to do is look at some exercise in Pilates that sometimes gets confusing. So we're going to use the Franklin balls. These are product from Eric Franklin. I'm a Franklin Level 3 Educator. And we're going to use these balls to help us feel more about what's going on in our spine and our pelvis, so we can could organize in the knee stretch. So I'm going to ask Amy to place her back away from the camera. So you can see exactly where to place these balls. There's a little confusion about that. Little word of caution, if this hurts, don't do it. So you don't want to put the ball on an area that-- where you have pain or discomfort. Also, don't overdo it. So some people think this is so wonderful that what they do is they do 32 million. And then, they wonder why they don't feel very good.
Finding the Placement of the Franklin Balls
So what I'm going to do is point out the back of Amy's pelvis, the two ileum, the sacrum, then, the ribs. And I'm going to place the balls for this particular exercise between this area so that each ball is on either side of the spine. So that's important. You don't want them on the pelvis. And you don't want them too high in the ribs. And as you do this exercise, what will happen is you'll start to feel the place that's right for you. So Amy, here are the two Franklin balls. She's going to start with her knees bent, feet flat on the floor as wide as her sits bones. Good. And so could you just tilt your pelvis into a posterior tilt for a moment there, and then, down into an anterior tilt? And I'm going to ask her to take this arm and just get it out of the way. Normally, you just keep the arms in a comfortable position by the side.
An Arch Versus a Curl
So, again, if she does a posterior tilt, what's going to happen to the sits bones? And we all know where sits bones are because we sit on them. The sits bones will close. They'll come together. And then, as she goes down, the sits bones will open. And they'll get a little wider, so the width will be this direction. Now, we're not talking about inches or miles. We're talking about a little bit of movement. So I'm going to ask Amy to come up sits bones coming together. And notice what's happened to her pelvis. And then, the sits bones are going to open. And you'll notice the posture changes in the spine. So sits bones close. And what Pilates position would that be Amy? What would you call that? Scooping. Scooping, or maybe a-- C-curve. --C-curve. All right. Now, sits bones open. And what would you call that? Arch. An arched back. All right.
Now, the key to this exercise is you must use the image. So I had somebody doing this, one of my elite runners, and she came in. And I said, well, let's look at the ball exercise again in your back. And I said, what are you thinking about? And she said, oh, I forgot that part. So I'm now going to say it slowly a couple of time so that Amy is actually hearing the words and doing the movement of the bones rather than thinking, I'm going to make this C. I'm going to make this arch. So is that clear? It's good. All right. So sits bones together or closed. Good. And sits bones open, and we have an arch. And sits bones together, and we have the nice scoop for the C-curve. And sits bones open, and we have the arched back. And sits bones close, coming together. And generally speaking, when people are doing this, I tell them to do it about 7 times. It's nice 7 colors of the rainbow.
So Amy would you take the balls out for a minute? And then, tell me how your back feels when you're not busy trying to do anything. Level. Open. It feels level, open. Anchored. Anchored OK. So that was one image and that represents one dimension of movement in the pelvis. So we're going to do it again seven times, so if you put the balls back under the same spot. And this is a cue that's used a lot in the Pilates world of thinking of the tailbone. And so the tailbone comes up. And what shape does that make? C-curve C-curve. Tailbone goes down, what position is that? Arch. Arch back. So tailbone goes up. And you're allowed to breathe if you want. And tailbone goes down. And the tailbone goes up. And the tailbone goes down.
Are the Abdominal Muscles Getting Shorter or Longer?
Now, since we're doing Pilates in a few minutes, I want you to think about the tailbone and how the tailbone is part of your spine. And tailbone down. And tailbone up. Good. Notice that your muscles follow the movement of your bones. So are your abdominals getting shorter or longer as you're tailbone goes up? Shorter. What's your lower back doing? Getting longer. Getting longer. Now, the tailbone goes down. What are your abdominal muscles doing? Stretching longer. They are getting longer. And the back muscles are? Shorter. Shorter. Let's do that two more times. So abdominals shorter, abdominals longer. or abdominals shorter, back longer. Abdominals longer, back shorter. So take the balls out. Which image did you like best, tailbone or sits bones? sits bones. Sitz bones. You can switch it off either day. They all work together.
Quadruped Position with the Franklin Balls
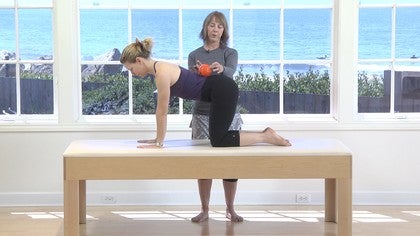
So let me have the balls for a moment, and we're going to put those aside. And let's come up to the quadruped position. And we're going to-- well, I do want the balls. What I'd like you to do is sits bones open. And you can see while she was on the ground, that's what her sits bones, the balls were doing. And then, as she put sits bones together, pulled them together, you see that's what the balls do. So the balls act like a ball bearing as she moves. And sits bones open, arch back. Now, sits bones closed walking up her spine, and we have an arched back. We don't want to forget that the neck, strangely enough, is part of the spine. And then, we're going to have the sits bones open, and we're going to arch, arch, arch, arch, arch, arch, arch, following the spine. Don't get too-- yeah. Don't get too interested in doing the neck until we get to the neck. Good. And then, let's do tailbone down, tailbone down, tailbone down, walking, walking, walking, walking, walking, walking, walking, walking, walking, walking, walking, walking, walking, walking, walking, walking, walking, walking, walking all the way, yes, to here. Very nice.
Knee Stretches on the Reformer
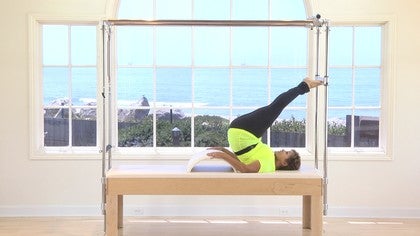
So let's take this to the reformer. So we've brought Amy to the knee stretch position. Feedback I get from many teachers is that they don't like to teach the knee stretch exercise because their clients never get it, and they don't understand exactly how to get into the positions. So what we're going to-- we've got Amy placed in, now, the round back position. And we've got a little stimulus from the ball, so we understand where that is. I'm going to ask her to move back in the round position. And we know that round back is sits bones together, and the tailbone is moving toward the pubic bone, or a dog tail that's pulling front. And so she's going out, and she's coming in. And she's mindful of her shoulders. She's mindful of the neck, so the curve from the tail bone to the occiput is one nice, smooth curve.
And then, I'm going to ask Amy to go ahead and move into the next position starting from the tailbone. Tailbone is going back. sits bones are opening, walking up the spine just like we learned on the balls. Good. And she's going to press back keeping the sits bones open. This is hard for a lot of people. They'll lose it on the arch back position. Open and close. And sits bones stays open, and the machine closes. So the sits bones are remaining open.
And now, we're going to give her a little fun exercise. We're going to see if she knows how to make the change from the new information that she's gotten from her Franklin ball experience. So out in the arch. And then, making the shift into the round back as you close the machine. Good. And out in the round back, arching tailbone, sits bones all the way up through the spine. One more time. Out in arch. This is just for fun. No, it's not necessarily something that maybe Joe Pilates did, but he might enjoy seeing Amy do it because she's doing a nice job today. So I find that I can get even my clients who have not much movement experience into the correct position. Or, let's say this, a more correct position much faster, greater efficiency, and they like doing it.
The Successful Beginner - Playlist 7: Movement Breakdowns
Comments
.
Thank you! When people understand how the body works, it is a motivation to do certain exercises that may have seemed just routine or not important in the class. When I question most teachers about which exercises they do not like to teach or which ones the students do not "get", they often include Knee Stretches in that list. I say "let's make that a favorite!"
You bring up an important point. How do we teach a new person? I like that challenge. It really depends on the individual. Sometimes they respond immediately and others "wake up" after a few more sessions. What I find interesting is what I call "the door into the embodiment". Usually the pelvis and the core are the first place. However, some people need to be persuaded by having their perception of their problems address first. For instance, I had a runner who just came for the chest and breathing. Once I gained her trust, we could move into a more classic approach. I believe that gaining trust psychologically is just as important as providing exercise.
You need to be a subscriber to post a comment.
Please Log In or Create an Account to start your free trial.


