Description
Shelly starts with an explanation of what to expect in this class. The movement begins around 2:40.
About This Video
Transcript
Read Full Transcript
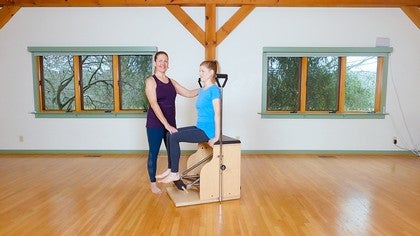
Hi, everyone. Welcome to class. I'm Shelly Power from Polestar Pilates and we're continuing in our knee health series. And this is a chair workout that you can do with an active adult who might be coming back from an injury or a surgery, maybe something like a meniscus repair or cleaning the meniscus up inside of the knee, maybe an ACL repair. And they're either coming back from the surgery or maybe they had an injury to the same tissues.
So, active adult wanting to get back to their activities, to their sports, their recreation or maybe it might even be their job that they're returning to that has an active component to it. So, things that we want to make sure that we're keeping in mind and there are so many different Pilates apparatus exercises that you could do with this person that works on the whole body. We're gonna focus on a few key, lower extremity exercises, but also bring in some lateral motion too, to make sure that we're working on the whole body. So hip mobility, I know we're talking about the knee, but hip mobility is really important, both in hip flexion and in hip extension, ankle mobility really important and not only the mobility there, but the control. So, we wanna have control of the motion.
And quite often, when we're talking about movement and working out, for some reason, we think that we should stabilize first. Stability first is really not the way we wanna go, because if the mobility isn't there, that probably means that the alignment isn't there. And then what are we really stabilizing? We're either in a poor position and we're trying to hold that or we don't have the mobility in the first place. So, that's not really stability, 'cause stability is active.
So, we wanna make sure we have the mobility and the alignment. And then we layer in the control of that movement or that part of the body. Those are the three key things that we wanna work on. And then that together really gives us the movement integration piece. And I always go back to the guiding principles of Joseph Pilates and one of them was whole body health.
So, as much as we're working on the legs, the lower extremities, we're really thinking about and keeping in mind the whole body. So, do all of your different movements that you have, whether you're on the chair or reformer, trap table, doing mat exercises, make sure that you're doing full body workout, really important. So, we're today gonna work on the chair. Leslie is going to be with me today. She's gonna be demonstrating the movements and we're gonna start lying down out in front of the chair and I'll show you a way that you can help clients, get into the right position.
So as you lie down, just draw your knees into your chest. And I do that mostly, because clients will stick their feet really quickly, right underneath the pedals. And I, of course, as the teacher, I'm gonna push the pedals down. So, now you can put your heels right against it. This position, and you know how when you have started to do a bridge and all of a sudden it feels like your feet are too far away or too close, that's what you're gonna feel here as well.
So, now she can scoot back or scoot forward. So, she feels like she's in a position where she has the strength to push down. So, now allow the pedals, and we'll do it together, to come up so you have a sense of the movement, right? And keep adjusting where your heels are, so that it feels like you can actually pull the pedal down a little bit. So, yep.
There you go and press down, good. And I'm gonna gradually come away and offer less and less support and you good on your own? And pull down, good. And what I'm interested in is making sure that her thighs relatively stay in place. So, it's not in rigid way, but I don't want her pulling her knees toward her, 'cause that's gonna activate her hip flexors more.
And what I'm after is working on the hamstring a little bit more to pull down. Yes and you'll feel that if you put your fingers or your thumb at the hip flexor area, you'll actually feel a change once they get used to the movement and the hip flexor area, will be a little bit quieter. Good. Now come all the way down and hold here and I can help her with the pedal. If I feel like she needs to have a little bit of help, I tend to do it from standing, 'cause I'm a little bit more powerful there.
Begin to roll up into your first bridge and then roll down. That looks great. Remember in bridging, we really wanna make sure that we're thinking of length. We're not thinking of tucking. So, as she rolls down, maybe the pelvis is tilting about 50% of the amount that it could.
That looks great. Do one more bridging and rolling. So again, we're conditioning and starting to work into, not only the range of motion of hip neutral and hip extension, but we're conditioning the tissues around it. And then pause there. Let the pedals up slowly.
And now I'm gonna take the dowel out and have her do this where the two pedals will move independently of one another. Just a good safety practice to get into, when you're taking the dowel out, remember if only one spring is on the other pedal will fall. So, just get in the habit of putting your fingers around both. And that way, if by chance you didn't check and there weren't two springs on, it's not going to fall and make a loud noise or potentially hit the client. So, now you can put your feet back on and start to pull down slowly and undoubtedly it does this.
That's just the nature of it, but try to move them pretty symmetrically. And when somebody's coming back from an injury or a surgery, you might notice that there's a little bit of difference in the timing of how they pull the pedals down. So, make sure that you're being sensitive to that, that it still feels okay, that it's not too much load for the joint. And of course Leslie feels fine. Yes, good.
Now, let it up about halfway and now you can do a little reciprocal movement and it doesn't have to go all the way up or all the way down. Just find a mid-range. So now again, we're looking at a little bit more spontaneous movement, so she can't think about so many things, 'cause she's moving the two legs independently. I then can watch and see how is her alignment? How is everything happening in her spine?
And she's doing a really nice job and then let the pedals up, let it come all the way to the top. Great. And you can take your feet down and just scoop back and have a seat for a second. So again, as we're in that motion, the things that we're really looking for and why we're doing it is to give a little bit, again, we call it conditioning. So yes, it's partly strengthening, but it's also the control part, the proprioception around the hip joint that is going to really affect the knee.
So, if we're up and on top of our, pelvis is on top of our thigh, then there tends to be less stress, put down into the knee joint. So, we wanna make sure that these muscles are working appropriately and we have the best alignment that we can. So, that's the start of that. And it's also nice to start lying down sometimes, we don't have that many supine exercises on the chair. So this is one of my favorites, the frog lying flat.
So, you can come up to standing and just stand here for a moment. I'll take the mat out, 'cause we don't need that any longer. And we're gonna go into the double leg pump. I'm gonna change the springs. And then we'll take the sitting position that is very similar to the double leg pump or the seated footwork on the reformer where you're sitting on the reformer bar and pushing the carriage away.
So, come and have a seat here. And there are different ways that people do this exercise. There are also different chairs. So, if you have a chair with a back on it, then a lot of people bring the person back to sit back against that. So, if you were to scoot back farther, there's the edge.
If I became the back of the chair, the piece of board that is here, you can see that she's quite far back and as she starts to push down, A, she's not gonna be able to develop a lot of strength. The chair actually stomps her thigh from moving and she ends up, I'm gonna step away so you can stop for a second. (lady laughing) She starts to, instead of using her hip to extend to push the pedal down, it starts to become a quad exercise. And it's not really, to me it's not the best choice for somebody coming back from a knee surgery, 'cause it's kind of a strange stress on the knee. So, at first at least scoot forward.
And I always say, it's like you get as close to the edge as you can, without falling off. So, it's quite far forward. This allows nothing to touch the back of the thigh. So, as she presses up and down, she's got a lot of a range of motion and she's mostly starting to use the hip. So, she's working toward hip extension or in this case less hip flexion.
I definitely am looking at her alignment and sit a little taller on your sit bones if you can and bring your upper body a little bit forward, yes. So, I talk about the oval of the ribcage and the oval of the pelvis. And as much as we can, we'd like those two parts balanced one on top of the other as they're going up and down. And then that's the challenge. How much can you keep that body alignment as you're moving the pedal and hopefully controlling the weight, so it doesn't feel like it's throwing you around.
Now if she has this much range of motion in her knee and knee flexion, I'm gonna keep her sitting on top of the chair, 'cause again, that's one of our goals is to improve the range of motion of knee flexion and also knee extension. Probably they aren't really lacking that much, by the time that they come to you in your Pilates classes. But it's just something to think about. If, and you can pause for a moment, if she didn't have this range of motion, then I am definitely gonna sit her higher on top of something, a small mat, a moon box, anything that's gonna raise her up. So, it's an appropriate range of motion for the knee joint.
But remember usually in this population, we're already back to that or back close to it. So, that would be something to take into consideration. I'm again, going to make it a little bit less stable, by removing the dowel. And now just like we did when she was lying on the floor, she's going to press down, moving both pedals at the same time. And again, there's so much different choreography here.
You could do this with the legs turned out, you could do it with the legs turned in, wider apart, closer together. I really like closer together for a lot of these activities, because when we've had a surgery, sometimes we tend to have the feet apart for better balance. And this would be for really any person. And we wanna make sure we're getting back to where we have our balance right over our ankle. So, I tend to like a narrow stance at least some of the time and then start to do your reciprocal motion, one and the other.
And again, I'm watching for, and you don't have to go all the way down. You can go just to the point where you feel like you can keep really good posture. Now, it looks great. And she's doing a super job of, kind of feeling what's going on and managing it and then let that go for a moment, bring them together. And from this, we can start to go into our ankle motion.
So again, one of the ranges of motion that we just, as people today, we don't have enough dorsiflexion, the flex part of the ankle. So, we wanna make sure that we are working the range of motion and getting the control of it. So yes, she already knows what's gonna happen. So, we're going into the Achilles stretch and scoot the feet back just to smidge. Yeah and it's really important again, whether you're standing on the floor or on this pedal or on the foot bar of the reformer, that when you lift your heel, your toes have something to push against.
Otherwise you're using the anterior muscles and that's not really how things were designed. So, we wanna make sure we're there. Good. She's gonna keep her knees, about the same height as her hips, more or less. Bring the knees up just a little bit.
Yeah, right there. I usually put my hands here just as a guide, you could also have the client put their hands there to be a guide as she's flexing and pointing at her ankle and she's doing a good job. Keep your knees up here a little bit more. Yeah, great. And you can see how, just everybody has that little, (murmurs) as they're going into the flexed position.
That's normal and that will improve the more you do it. So you'll gain that control the length, the eccentric lengthening of the back of the calf and you'll have better control there. And this is super important for motions like running or jumping, where we need to be able to decelerate the heel. We don't want it to clunk down. So, we wanna have that control.
Fantastic, feel, okay? (lady laughing) Take a break for a moment and just come off to stand here for a second. So, that was our seated work. And then we're gonna go into a little bit of standing work, but rolling forward. So, we talk about having good spine mobility.
We could do this next exercise, which is gonna be inflection. Make sure you're doing your swan movements. Make sure you have your thoracic extension movements too, because it's really important that we're maintaining a good mobility through the ribcage, but we're gonna do hamstring one and I'm gonna show you a little different version of it. It's not the traditional version of hamstring one. So, stepping back here, take into consideration to the different manufacturers.
This lip or piece of wood is different lengths. So, if you're one that likes to say, "Put your toes against this," just keep in mind, different chairs have different proportions. So, you might have to step back or step forward. Also depends on the height of the client. So, come up to stand and scoop do scoot back just a little bit.
So, give yourself a little space there. That's it. And then the first time somebody does this, I don't make them go through the whole standing roll down. I just let them feel it. So, bend forward and put your hands on the pedals and begin to push the pedals down a little bit, being mindful that if you let your head curve in a little bit, so you're looking more towards your knees.
That's right and length in the back of your neck, that's it. And then to roll up, remember it's the pelvis that goes first. So, the pelvis is going and then you can just pause right there and push back down. And so what I'm watching for besides her upper body is I'm looking at how she's standing in her feet and her knees. And Leslie tends to have her weight a little bit back, which is what everybody does.
So, encourage as the client can to have a little bit more weight at the front part of the ankle and the knees are straight but not locked, but fully straight. Yeah, that's right. And then this time, let it come up and roll up to stand tall and center your weight, again right over the front part of your ankle. That looks good. That looks good.
We often in standing think that our weight should be back and we are really literally vertical. We're just a little bit forward. We put our weight into the front part of the foot. That's why we have feet. Well, I don't know if that's why, but since we have them that's where we wanna be.
Because everything we do like walking and running, it's a series of falling and catching yourself. So, if your weight is forward, that'll happen. If your weight is back, you're gonna adopt some different strategy, which is not ideal. All right, so I'm gonna add a little, as I said a little to this. So, take your hands on again and push down about halfway.
And then this time we're not gonna have the spine round. We're gonna have the spine lengthened. So, go into more length here and you can let the puddles up and just look down a little bit. So, keep them down a little bit. Yeah.
And keep lengthening the back of your neck. And if you need to, you can step your feet back just a smidge. All right. So, this is gonna be the cousin of a quadruped exercise where you might stretch the arm in the leg out. So again with actively straight legs, so they're not bent, you're gonna stretch back and then place that foot down.
So again, we're looking at a weight shift and because our hip joints are pretty narrow, we don't really have to shift our too much to stand on one foot, especially if the legs are quite close together. So, you will get the feeling of that, good. And remembering back to our bone rhythms, when the leg goes behind or the hip goes into extension, relatively, we're thinking about an internal spiral. That's just what's already happening in the hip joint. Good, last one back out.
Good, now hold there and begin to just do a little bit of a bend and then back up. Yeah, so you can start to look at, very nice, place the foot down and change sides, how is the person bending their knee? How is the tracking? We want the knee to go in the direction that the toes are going, very nice. Put the foot down and then just bring yourself back up to standing tall and take a break from that.
And you'll often notice a little bit of a collapse in when people squat and Leslie was not doing this, but when people squat or bend, often it has that alignment to it. That really isn't a problem at the knee. That's more a problem with the hip muscles. And so can you still have the deep hip mobility to squat, but these muscles are helping you maintain your alignment? And that's really important.
And a lot of people have knee pain, not because they've had a surgery or something, they just have knee pain, because they've adopted this posture and these muscles really aren't conditioned to work to keep them in a better alignment. So, just keep that in mind as we're going. So, the next exercise we wanna get into is a little bit of a standing leg pump. So, this is common. This is the precursor to the forward lunge or often known as going up front or the mountain climber.
And we're gonna do the version that starts first, just down on the floor. And this will be able to look at the positioning. So, I think the spring should be fine for you, Leslie. So come up and stand hands on. And again, if this is her first time, she's never done this before.
I'm probably before she gets close to the chair, I'm probably already gonna push this down, because clients tend to, wanna have their feet up on the wooden part. And that's not where I want them. So stand up tall, just, nope, you can keep the foot down, but just have your posture tall. Yeah and then let it come back up. I'm gonna put these handles down a little bit.
I had it up for something else we were doing and I'm gonna put it down, so she has better alignment. All right. So now you can have your hands on. And again, if this is the first time she's done it, I'm gonna give her some verbal instruction for safety, which is to move the pedal slowly. But you know, if you're a Pilates teacher, you've done this with clients, they've pushed it down and then they've let it come up really fast and they go flying over backwards.
So, letting the pedal up slowly at first is really important. And then once I know that she knows what to do, I can step away. And now I'm again gonna look at her posture. She's doing great. But again, what happens often, if you stay down there for a second and let your weight come back onto your heel, do it kind of the wrong way.
As people get back here, she has no control. It's kind of like sitting far back on the chair. So, shift forward again. So, you have control and then let it come up. Right, so I'm looking at the mobility in this hip.
I'm looking at her standing posture to make sure she's forward. And I can test that, this time press down and leave it down. And now just do a heel raise on the back foot, lift up and down. So, if she has to do any major shifting to lift her heel up, you know she probably wasn't in the right place. So, we want the weight forward.
Now, let's actually keep going with this, this is a fun variation. So, you can put your heel down and let the pedal up about halfway. And the client will have to figure out where that, where halfway is for them. Now, continue to lift and lower your heel a couple of times. Good and she can go to less hand support, eventually to no hand support, but not now.
And we'll just go to less hand support and she's doing a really nice job of maintaining the pedal in place. Good. Keep your weight a little more forward. That's it. And really from your foot, yes, that's it.
Last time, enough of that, good. Let the pedal up really slowly. And then you can step down. I won't make her do it on the other side, but start to play with some of these things that are a little, makes the client a little bit more responsive, instead of always flat, always kind of do slow tempo, change the tempo, make it faster and start to add in some choreography. So, they become a little bit more, they're working on their awareness and proprioception, more than just a movement, okay?
So, that's the standing leg pump. Now you can also do it crossed over to the side or out to the side. We're gonna do the crossed over version standing this way, but you can also do it standing out to the side this way or standing crossed over. There's lots of versions you can work on. And again, it's not so much for the moving leg.
It's much more for your support in the coronal plane. So, really important that we have that, even though we do a lot of sagittal stuff, we need to have movement in the coronal plane as well. So, I'm gonna make the spring just a little bit lighter and come around and stand behind. All right. And I just kind of line up off of the pedal.
So, I put my standing foot in line with the dowel and then my other foot up on top. And this is really the place where you're gonna have the most ease. So, this would be the place to start. And eventually you'd work yourself around to coming to the side, but we're just gonna do this one for today. So, stand back a little bit and make this leg be in line with the dowel.
So, go over a little bit to the side. Yeah and turn this leg out from your hip. That's perfect. And then the other foot goes on and keep holding here. Same idea of pushing down gently and up slowly.
And remember, you probably have to make the spring a little bit lighter than when you're doing it facing. So, just you might not have to, but usually it's a good idea to do that. And so now go to less hand support, maybe no hand support, but again I'm just looking for some degree, more of responsibility, not to go cold turkey as we say, right? And again, as the leg is coming up, I'm reminding the thigh not to turn out more, but just the underneath, what's happening in the ball in socket joint is that feeling. One more time and then slowly up, great and let that go.
All right. So, that's our standing work. So, now I think let's go into a little bit of the point and flex or the Achilles here. So, she's done that already sitting, but now we're gonna take it, into the normal Achilles stretch up here. And again, be mindful of this board.
Sometimes if it's long, you might have to stand up on a little something and even have your foot up on it. Most of the chairs now are a little shorter, but just make that adjustment if you need to. So, you can come around and stand, your toes pretty close to the front edge of the board, and then bring one foot up onto the ball of the foot. And then you have a built in little, almost like a little place, right under your kneecap that's gonna sit right here. And then begin to point the foot and flex the foot.
That's great. If for some reason, again, bearing weight here is not comfortable yet, it will be, but if it's not, you might try patting it, but you also may just do the first one that we did in sitting with the double leg pump, until you can bear weight against the knee, just under the kneecap. And so again, I'm looking at her alignment and I'm really looking at how she allows the heel to come down slowly. And she's doing a great job of that. Be mindful too, as you're watching that and she's doing a great job at this, but at the top, sometimes people wanna lift the ball of the foot up and go higher.
So, it's not about that. It's really about getting good mobility too in the metatarsal joints. Do one more and then let that go and step down. We'll do the other side and show you a different position for the arms. If you don't wanna have the hands up here, you can put the hands out and down a little bit forward on the chair.
So as her knee comes on, that might be a little bit more comfortable of a position pointing and flexing. So, just do what feels best, again, check out the other leg, right? We're always looking at both sides to make sure that the knee isn't hyper extended, but it's also not bent. We really wanna teach people and give them the awareness of true straight. So, that's what we're after.
One more time and then let that go. Good. All right. So, we're gonna change and do a little bit of body movement, and then we're gonna come back and finish up with the forward lunge, which as I said is, we did the standing leg pump first and then we get into forward lunge later. So, your thinking of your progression of how we're gonna continue to challenge people.
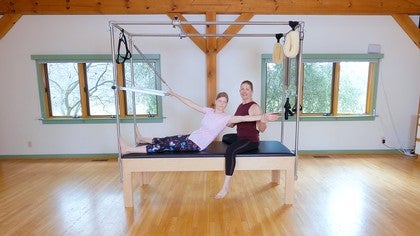
So, you're gonna come over to the side. I'm gonna make a change in the springs. You're gonna come around to the side and you're gonna lie down on your side. So, let me change the springs a little bit. This is one where I tend to use a single black spring.
So, if you have a chair that has lighter and heavier, I tend to use a single heavy spring for this. And with that, then you have some wiggle room. So, what feels supportive and this is always where we go with the chair, what feels supportive to one part of the body. It might feel really challenging to the other part. So, the arm and shoulders sometimes get tired, even though the spring is right for helping to support the body.
So, keep playing around with your spring tension. So, we're gonna start here and we'll see how we go. So, when you sit down, you can see how Leslie is kind of to this side. Yeah. If you get too close to this edge, it feels like you're gonna drop off to the side.
So, you wanna actually stay this way a little bit, but to your comfort and then come up. And I like to stand here at first and be the support, and then take your hand to the pedal and just gimme an idea if that feels like it's gonna support you enough, too heavy or too light?
Come on up, that's not a problem. All right, so hopefully this isn't too heavy, 'cause I don't have anything in between. (lady laughing) All right, so I like to stand here. You could also do this with the chair against the trap table. You could also do it with some boxes here.
So, go over. See what that feels like and come back up. Does that help you a little bit more? Great, okay. So, this is a black spring up on three, four would be at the top.
And so as we're going, go ahead and look a little more forward of yourself. What I'm interested in is that here, her ribs lift up and then when she gets here, these ribs expand. So there's a real fanning, open and closed of the top of the rib cage and then the bottom of the rib cage. And then come up and hold here and then see what it's like. And you can keep your hand here or you can put it on the front of the chair, however you like it.
Just start to lift this leg up a little bit and down. So, not only are we working on control with the upper body, but now I'm working the lateral hip muscles that she needs when she's standing. In a pretty challenging way, let's make this one the last one and then stop. Come up and we're gonna change sides, do just a couple on the other side. So, we can really see what's happening in the spine.
One of the common mistakes that I see is that people let their ribs drop down, below the height of the chair. And that's just not so safe that sheer force or that lateral force. Yes, so my cue is going to be to move these ribs. I'm sliding my hand. I wouldn't normally do that, but just so you can see the direction.
I'm sliding these ribs this way, toward the top of her pelvis, right? As if she was going to curve the other way. So, you could kind of think of this, it's very similar to the side bend exercise that we would do in a plank. So staying here, you know whatever height feels comfortable, you don't have to come all the way up and start to lift and lower the leg. Now, we're just gonna do lift and lower.
You could do circles, you could do sidekick, you could do a bicycle. So, there's lots and lots of things to work on here as she's going and make this next one your last one and then pause and come on up. Good. Great. So again, that lateral motion important.
We tend to stand out here sometimes and we need to be able to get here. And then it's this muscle group that's helping to get us there. Now, I will show you an exercise for home and then we're gonna go into our forward lunge or the step up. So, actually just have a step just right here, yeah. And turn sideways this way.
All right, so when we go into normal standing and walking, as we have lots of variations on our posture, some people tend to be a little tucked under, they walk behind themselves. Some people have the pelvis way out and their ribs are leading the way. And we want as much as we can to have from the ankle through the knees, the pelvis, the rib cage and the head. And one thing that you can do to test and you can just try this, even right now as you're watching this, is to just slightly lift your heels from the floor. So, if you look forward, maybe I don't know, half an inch at most and then you almost do this little, it's almost like a little bounce, but we're not leaving the floor.
So you can do less, do smaller and faster. So up, down, up, down, and you'll kind of figure out where you have to be. That's pretty close to where your best posture should be. So, not back on the heels. So, one way we can work on that then and I'm gonna do it over here.
So you can see, and you can see me is standing on one side and pull one knee up to your chest. If balance is a challenge, do it next to something. So, you can hold on to a wall or a dowel or whatever. As much as you can, even though the more you pull your leg up, the more your hips will be out of alignment. So, get the best alignment you can.
And then you're gonna challenge yourself to get this leg really straight. Leslie's already doing it, but we tend to bend our knee when we pull up. So, straighten this leg a lot and now you're gonna let go and hold here. She says confidently (lady laughing) and then place the foot down. So, two different things.
So, you do on the other side. So, two different things that we're wanting is I wanna work on the hip flexors. So, they're active and strong and the hip extensors for keeping this leg straight, good. And she has great balance and then slowly put the foot down. The first time people do this, it's really challenging.
And again, you'll pull your knee up and right away, you'll tuck under. So, we don't want that. We wanna keep the hip sensors strong. The hip flex are strong and it's a great way to get a little stretch too. So, I'm using my hip flexors in the front, but I'm stretching the back of this hip and the same as I'm standing and using this, I'm lengthening this.
So, it's a super exercise. So, best for last, the forward lunge. And we're gonna do a little bit. Going here I'm gonna increase the spring quite a bit and you might have to even increase the spring, more than you normally would, just in terms of confidence. So, the client may actually have the strength to do this, but they may not have the confidence yet, because they remember right when they were doing it before.
And it was a little bit challenging. So, they'll remember that probably, more than how successful they were. So, we wanna make sure that the clients are successful, all the time in our movement. That's super important. So, increase the spring a lot if you need to.
You can always take it back down. So, I am definitely going to talk Leslie through this. She knows how to do it, but I'm gonna show again, if you've not done it before. So, hold on. The first time we're gonna do it together, 'cause it's quite heavy.
So, you put one foot up and push it down and I'm not doing a lot, 'cause I want her to really understand the weight of this. And then you're gonna take your other leg and place it up on top and just hang out there for a second. So again, there's some differences in how people teach this and some people on purpose don't really go anywhere yet. Put your weight back over this foot more. Some people teach it back here and that could be okay if you were trying to go up and down, without increasing the knee flexion here.
But it's not functional, because you would not climb stairs or go rock climbing or go bouldering and step with your foot and your weight back. You can't go anywhere. So, you have to get forward. So, you're increasing hip flexion, you're increasing knee flexion. And then as she keeps shifting her weight forward, the pedals are gonna start to rise and she's gonna come up just to about there or so and come back down.
So, I can't stress enough how important it is to get the weight shift. So, imagine where you're gonna end up with your pelvis over your ankle. That's the line that you want to move in. Do one more, keep shifting your weight forward. And this time go all the way up to standing.
Yes and you can keep your fingertips on there for balance. That was great. Eventually clients will do this all no hands. You can use rotating discs and all of that. But before you get to all the fancy stuff, make sure the mechanics are correct.
So, step back now with the other foot and it's fine to look back at first, get your tallest posture, right? Good, that's it. And start to go up and down and you don't have to come all the way down. You can just come part way down. Good and I'm just helping her get her ribs, a little bit more over her pelvis.
And if the bones are aligned correctly, the body's strong. So, it's when the weight is back and things are off that it feels like you're weak. It's not that at all. It's just the alignment wasn't correct. So go forward more.
Yes and now go all the way up. Push and go all the way. Go, go, go, go, go, go, go. Yes, that's it. So, you wanna be in that line.
So, the moment you're ready to, you can let them come all the way up. Now, we're gonna do one last one. That's kind of similar to scooter, right? It reminds me of scooter or you could think of it also as related to knee stretch with the knees off of the carriage where you're in the round position. This is the back step down part of it.
So, put one foot back and come down most of the way and then take your hands just to the edges of the mat. And you're gonna be a little bit rounded forward. That's it. From here begin to bend and straighten this leg. So, you're gonna stay forward.
Push a little bit more into your standing leg. So, lift your hips up a little higher, there and begin to go back and forth. And we'll do only about a hundred of these. Keep going. (lady laughing) Five is enough.
Three is enough sometimes. One more and then stop and push it all the way down. Good. Get your bearings, bring your hands up and let's switch sides. So again, things that happen is the person wants to go down too low.
So, we wanna make sure there's a little lift. So, I'll give you a little trick before you get there. So when you're there, your body and your thigh are gonna be touching. What you wanna do is try to make space there, but don't actually leave your leg. So, it's the feeling of doing it as opposed to doing it.
So, lean forward and put your hands down. Let your weight shift forward a little bit and come up a little bit. That's it, right. Now, try to keep some space here, even though you can't and then let this leg swing as it bends. So, it's gonna swing in and up.
So, bend like your knee is gonna come up here. That's right. And push away and let it feel kind of light, even though it's a lot of work. So, a little quicker, up, down. Good and you'll see sometimes you get that jittering, just do one more up, down.
And that's because, come all the way down, all the way to the floor and then put both feet on the pedals and you can just stay there for a second and then step off, get your bearings and we'll let it up together. Yes, she knows. So, we get that little jittery bit again, because the glute muscles, sometimes aren't used to eccentrically lengthening. So, when you see the pumping, you'll often see that (murmurs) and that's what's happening there. So, I hope these movements have given you some things to think about when you're working with your clients.
And really these are no different, than the regular exercises we give clients, but we're just being a little bit more mindful of the whole posture of the body. Make sure that we are getting into as much, hip flexion and extension, knee flexion and extension, especially ankle dorsiflexion, but good to work on planar flexion as well and the control there. Then getting all of the rest of the body to have its posture so we're efficient. The better aligned we are, the less stress there is at any part of the body. And that's really our goal as we're returning.
The tissues have been corrected. The surgery's been done. The tissues are strong, surgery now for knees is quite quite good. And the turnaround time is very fast. So, you should be able to get your clients going, pretty quickly.
And I hope this has been helpful. And we'll see you again in class.
Knee Health - Playlist 2: Whole Body Movement for Knee Function
Mention
 |
Shelly Power (Teacher) |
 |
Gia Calhoun |
 |
Vanessa R |
 |
Midori Miller |
 |
Marie G |
Comments


You need to be a subscriber to post a comment.
Please Log In or Create an Account to start your free trial.
